
User`s guide


64 Chapter 5 Configuring the XStack Storage
5.2 Initial XStack Storage Setup
Once a network connection has been established with the XStack Storage unit and an instance of
the Web Manager is open, the following basic configuration tasks are recommended:
Configuring the management interface – described below.
Verifying the XStack Storage’s date and time settings – see Section 5.2.2.
Configuring for email alerts – see Section 5.2.3.
5.2.1 Configuring the Management Interface
Before using the Web Manager, ensure that the XStack Storage’s Ethernet network parameter
settings are correct for your network configuration. The XStack Storage ships with the following
default IP settings:
IP Address: 192.168.1.1
Netmask: 255.255.255.0
Gateway: 0.0.0.0
The following procedure describes how to adjust these settings. As part of this procedure, you
can change the XStack Storage unit’s name. While not required, changing the XStack Storage
name is recommended for identification and troubleshooting purposes.
After you change these settings, you must restart the XStack Storage unit for the new settings to
take effect. If you change the IP address, configure the NIC in the management PC to use the
first three octets of the new IP address; then enter the new IP address in your Web browser to
access the XStack Storage management console.
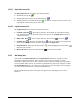
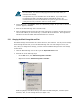
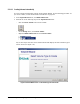
1. Click the XStack Storage icon at the top of the Physical Resources tab.
2. Perform one of the following steps:
– On the File menu, click Configure Out of Band Port.
– Right-click and click Configure Out of Band Port.