
User`s guide


100 Chapter 5 Configuring the XStack Storage
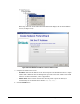
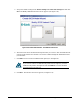
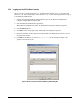
6. Click the Targets tab (see Figure 5-37). Notice that the iSCSI initiator software lists the
target node name. It found this name after you entered the IP address or DNS name of the
iSCSI target node.
Figure 5-37. Targets Tab on the iSCSI Initiator Properties Dialog Box
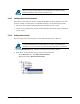
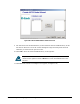
7. Click Log On to display the Log On To Target dialog box (see
Figure 5-38).
Figure 5-38. Log on to Target Dialog Box
8. To connect to the iSCSI target node, click OK.
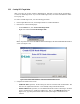
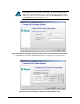
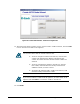
If desired, click Programs > Administrative Tools > Computer Management and verify that the
disk you have configured is shown in the Computer Management screen. In
Figure 5-, Disk 2 was
added through the XStack Storage management console. You can also right-click over the new
drive and click Create Partition from the right-click menu to create a partition on the drive. For
more information, refer to your Windows documentation.