
Data Sheet

ROBOT . HEAD to TOE
Product User’s Manual – URC10
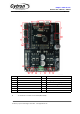
7. GETTING STARTED
You will need URC10 board and USB Micro B cable to start.
This section will show how to get started with URC10 and connect to computer for sketch
uploading.
7.1 Using URC10 with Arduino IDE
After installation of URC10 driver, user is ready to use URC10 with computer/laptop.
A. Connect USB to URC10, another end of USB cable to PC.
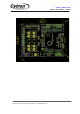
B. Power up URC10. When power is connected, power indicator LED will turn ON.
C. URC10 board will use power from USB if no external power connected.
D. Get the latest Arduino IDE from http://arduino.cc/en/Main/Software .
E. When the download finishes, unzip the downloaded file. Make sure to preserve the
folder structure. Double-click the folder to open it. There should be a few files and
subfolders inside.
F. Double click on Arduino IDE icon at your desktop.
G. Try BLINK example: go to FILES>Examples>0.1Basic>Blink
H. Select board: Tools>Board>Arduino UNO
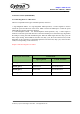
I. Select serial port number with biggest number
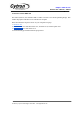
J. Upload sketch:
Now, simply click the "Upload" button in the environment. Wait a few seconds -
you should see the D0 and D1 leds on the board flashing. If the upload is
successful, the message "Done uploading." will appear in the status bar. A few
seconds after the upload finishes, you should see the pin 13 LED on the board
start to blink (in orange). If it does, congratulations! You've gotten URC10
up-and-running.
Created by Cytron Technologies Sdn. Bhd. – All Rights Reserved