
Operation Manual

36
CyberLink PowerDirector
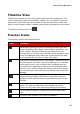
Adding Timeline Markers
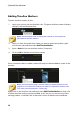
To add a timeline marker, do this:
1. Hover your mouse over the timeline ruler. The green timeline marker indicator
displays with the displayed time.
Note: use the timeline ruler to expand the timeline for a more precise
placement of timeline markers.
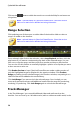
2. Once you have found the time where you want to place the timeline, right-
click on the ruler and then select Add Timeline Marker.
3. Input a Note for the new timeline marker, if required.
4. Click on OK to add the new timeline marker.
Once a timeline marker is added, media will snap to it when added to a track in the
timeline.
Note: you can manually drag a timeline marker to different position if the
original is not in the exact location you wanted it. Expand the timeline ruler
for a more precise placement, if necessary.
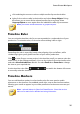
Right-click on the timeline ruler and then select Edit Timeline Markers to view a list
of all the timeline markers you have added. In this list you can remove any of the
existing markers, or double-click in the Note column to edit the associated text.