
Operation Manual

32
CyberLink PowerDirector
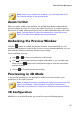
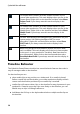
To set your 3D display device, do this:
1. Select the 3D configuration menu underneath the preview window .
2. Select one of the following options:
select your 3D display type from the list, i.e. 3D-Ready HDTV (Checkerboard),
Micro-polarizer LCD 3D (Row-Interleaved), 120Hz Time-sequential 3D LCD,
HDMI 1.4 Enabled 3D TV, etc.
if you are not sure which type of 3D display you have, select the Auto Detect
3D Mode option to have CyberLink PowerDirector detect it for you.
if you do not have a 3D display, select Anaglyph Red/Cyan mode and then use
anaglyphic (red/cyan) 3D glasses to view 3D content.
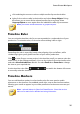
Enabling 3D Mode
Once you have set your 3D display device, you can enable 3D mode at any time to
preview your video production in 3D. To enable, just click the button.
Note: any 2D media in your production will not display in 3D. However, you
can convert all of the 2D media to 3D using TrueTheater 3D in Power Tools.
See Power Tools: 2D to 3D for more information.
To disable 3D mode, just click the button.
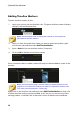
Editing Workspace
The editing workspace is where you create your project by adding your media,
various effects, transitions, and title effects. The editing workspace has two
different views, the timeline and storyboard views, which are accessed by clicking
the or button.
Note: you can set which workspace view is displayed by default in Editing
Preferences.