
Operation Manual


248
CyberLink PowerDirector
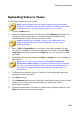
production you were working on is automatically imported into the window.
2. On the Content tab, click the and buttons to import
additional titles (video files and/or PowerDirector projects) onto your disc. See
Importing Additional Disc Content for more detailed information.
3. Click on the Menu Preferences tab and then select the menu in the library that
you want to use on your disc. See Selecting a Disc Menu for more detailed
information on selecting disc menus, or for information on customizing your
own.
4. Edit the selected disc menu's properties, including customizing menu text,
the number of buttons, background music, and more. See Editing Disc Menu
Properties for more information.
5. If required, right-click on your selected disc menu's thumbnail in the library
and select Modify to perform advanced editing on it in the Menu Designer.
You can also create new disc menus and 3D* menus in the Menu Designer.
See Customizing Disc Menus in the Menu Designer for more detailed
information.
6. The last step is to burn your production to disc. Do one of the following:
if your project is a standard 2D video production, click the 2D Disc tab. See
Burning a Disc in 2D for more information.
if your project is a 3D* video production, click the 3D Disc tab. See Burning a
Disc in 3D for more information.
Note: * optional feature in CyberLink PowerDirector. Check the version
table on our web site for detailed versioning information.
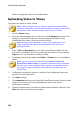
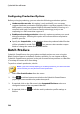
Importing Additional Disc
Content
The Content tab contains your current video production that will be burned to disc.
On this tab you can import additional titles (video files and CyberLink
PowerDirector projects), which, with your current video production, are called
Scenes on the disc menu.
On the Content tab you can add additional titles to your disc by doing the
following: