
Operation Manual

231
Producing Your Project
H.264 AVC*
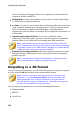
To output your video production in 3D, do this:
Note: if there is any 2D media in your video production, you must convert it
to 3D before production. See Power Tools: 2D to 3D for more information.
1. Select a 3D video file format by clicking it.
Note: if you select the H.264 AVC output format, you must also select the
container from the drop-down. You can choose from the .M2TS, .MKV, or .
MP4 container file format.
2. Select the 3D output format from the drop-down. See 3D Output Formats for
more information.
3. Select the Profile name/Quality you want to use to create the file. This
selection determines the video resolution, file size, and overall quality of the
outputted file. See Customizing Profiles for more information.
Note: in some versions of CyberLink PowerDirector, the H.264 AVC/WMV
video file formats support up to 4K* resolution (Ultra HD). Before
production, be sure to select the desired video resolution in the Profile
name/Quality drop-down. * optional feature in CyberLink PowerDirector.
Check the version table on our web site for detailed versioning information.
4. Configure the production options as required. See Configuring Production
Options for more information.
5. Check the production details and that the file will be outputted to the folder
on your computer where you want it. Click to set another output
folder.
6. Click the Start button to begin producing your file.
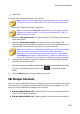
3D Output Formats
Once you select a video file format (or container), you need to select the 3D output
source format. This selection specifies how the 3D content is displayed. You can
select one of the following 3D output source formats:
Side-by-Side Half Width (L/R): a side-by-side 3D source format optimized for
4:3 or non-HD video productions.
Side-by-Side Full Width (L/R): a side-by-side 3D source format optimized for