
Operation Manual


221
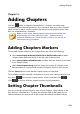
Adding Subtitles
Adding Subtitles
Chapter 16:
CyberLink PowerDirector lets you add subtitles to your video production, either for
a disc or imprinted on a video file. You can also import subtitles from a file, extract
them from an MKV file, or add them manually in the Subtitle Room.
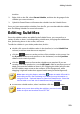
To add subtitles to your video production, click on in the Subtitle Room and
then to select one of the following types of subtitles:
Create subtitles for discs/files*: select this option to create subtitles that are
compatible with most DVD/BDMV/AVCHD/MKV playback software and can be
switched on/off like those found on commercial discs.
Note: when you select Create subtitles for discs/files, there is a Subtitles
option by default in your created disc menu in the Create Disc window. Text
formatting for disc subtitles is more limited. * Optional feature in CyberLink
PowerDirector. Check the version table on our web site for detailed
versioning information.
Create subtitles imprinted on a video file: select this option to blend subtitles
into the video.
Note: if you are creating subtitles for an MKV file, make sure you select
the Create subtitles for disc/files option, not the option where the
subtitles are imprinted on the video file.
Adding Subtitle Markers
Subtitle markers are the placeholders for the subtitle text added to your production.
They are added to display at the exact time the dialogue is spoken in the video
production, and display until it has completed. Unless you are importing subtitles
from an SRT file or extracting them from an MKV file, you must add all the subtitle
markers manually to your video production.
To manually add subtitle markers to your video production, you can:
click the play button on the player controls and then click the button
at the beginning of every piece of dialogue spoken to create all the subtitle
markers required for your production. Continue this process until the video is
complete, and then click the stop button to load the subtitle markers into the