
Operation Manual


182
CyberLink PowerDirector
Applying 3D Texture Settings
Select the 3D Texture Settings option to apply texture to the 3D-Like text by
selecting a text skin from the list. Click the Add Texture button to import your own
image. Based on the color properties of the imported image, CyberLink
PowerDirector applies a custom texture to the title text.
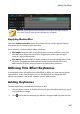
Enabling 3D Depth
If you are creating a 3D video production, select the 3D Settings*option to give the
3D-Like title text a 3D effect.
Note: when using this feature, select the button to enable 3D mode for
best editing results. See Previewing in 3D Mode for more information on
using this mode. * Optional feature in CyberLink PowerDirector. Check the
version table on our web site for detailed versioning information.
Once enabled, use the slider to set the amount of depth you want the 3D-Like title
text to have in 3D. Dragging the slider left will make the 3D title text seem nearer to
the audience (in the foreground), while dragging it right will make it appear farther
away (in the background).
Customizing Image Settings
If your title effect contains an image, select it in the preview window, and then click
the Image Settings option to customize it.
To apply a chroma key (green screen) effect on the image, select Apply chroma key.
Next, click on and then select the color in the image that you want to replace/
make transparent. Use the Tolerance of intensity and Tolerance of hue sliders to set
the level of chroma key applied, revealing the content behind the selected image.
Select Enable flip object if you want to to flip the image in the title text upside
down or from left to right, depending on your requirement. You can also enable a
fade effect on the image. Select whether to enable a fade-in and/or fade-out on the
image.
Note: when a fade is applied, note that keyframes are added to the Opacity
keyframe timeline so you can customize the length of the fade, if required.
See Utilizing PiP Keyframes for more information.