
Operation Manual

91
Arranging M edia in Yo ur Production
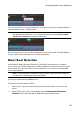
To insert audio into the workspace, do one of the following:
Note: if you want to add audio to a precise position on the timeline, consider
using timeline markers. See Adding Timeline Markers for more information.
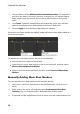
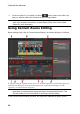
use the timeline slider to set the position where you want the audio, select the
audio file in the library, and then click:
to add it to the audio portion of the selected video track.
to add it to the voice track.
to add it to the music track. The music track is always the
bottom track in the timeline.
use the timeline slider to set the position where you want the audio, right-
click on the audio file in the library, and then select:
Add to Voice Track to add it to the voice track.
Add to Music Track to add it to the music track. The music track is always
the bottom track in the timeline.
You can also manually drag and drop an audio clip to a desired position on any of
the audio tracks available it the timeline.
When adding audio to the timeline (inserting or dragging and dropping), if the
timeline slider is over an existing clip, or you drop it on an existing clip, you are
prompted to use one of the ripple editing options to insert the clip:
Overwrite: select to overwrite the existing clip with the newly added audio
clip.
Insert Here and Move Clips on this Track to the Right: select to split the clip
and insert the new audio clip between the two portions. CyberLink
PowerDirector also only moves the clips on the same track to the right.
Insert Here and Move All Clips on the Timeline to the Right: select to split the
clip and insert the new audio clip between the two portions. CyberLink
PowerDirector also moves all of the media clips on the timeline that lie to the
right of the inserted clip, right.
Crossfade: select to lay the audio over a portion of the existing clip and auto
add a constant gain transition between the two clips.