
Operation Manual

89
Arranging M edia in Yo ur Production
Insert Here and Move Clips on this Track to the Right: select to split the clip
and insert the color board/background between the two portions. CyberLink
PowerDirector also only moves the clips on the same track to the right.
Insert Here and Move All Clips on the Timeline to the Right: select to split the
clip and insert the color board/background between the two portions.
CyberLink PowerDirector also moves all of the media clips on the timeline
that lie to the right of the inserted clip, right.
Crossfade: select to lay the color board/background over a portion of the
existing clip and auto add a fade transition between the two clips.
Note: the Crossfade option does not overwrite the content on the track, instead
adding an overlap transition between the two clips. See Setting Transition
Behavior for more information. The Crossfade option is only available if the end
of the new clip is not over any existing content on the track.
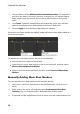
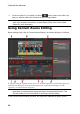
If the timeline slider is in a gap between two clips on a timeline track when
inserting a color board or background, you are prompted to use this ripple editing
option to insert the clip:
Trim the Inserted Clip to Fit the Gap: select to have CyberLink PowerDirector
auto set the duration of the color board/background to fit the gap to the right
of the timeline slider.
Creating New Color Boards
CyberLink PowerDirector lets you create custom color boards using the color
selector, or by selecting an area in the media file preview window.
Creating a Color Board Using the Color Selector
To create a color board using the color selector, do this:
1. Click on the button.
2. Select From Color Selector.
3. In the color palette, do any of the following:
Select one of the basic colors.
Use the color picker to choose a color, and the leveler on the right to adjust
the shade.