
Operation Manual


37
PowerDirector Workspace
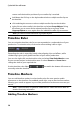
To add a timeline marker, do this:
1. Hover your mouse over the timeline ruler. The green timeline marker indicator
displays with the displayed time.
Note: use the timeline ruler to expand the timeline for a more precise placement
of timeline markers.
2. Once you have found the time where you want to place the timeline, right-
click on the ruler and select Add Timeline Marker.
3. Input a Name for the new timeline marker, if required.
4. Click on OK to add the new timeline marker.
Once a timeline marker is added, media will snap to it when added to a track in the
timeline.
Note: you can manually drag a timeline marker to different position if the original
is not in the exact location you wanted it. Expand the timeline ruler for a more
precise placement, if necessary.
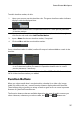
Right-click on the timeline ruler and then select View All Timeline Markers to view a
list of all the timeline markers you added.
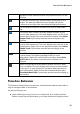
Function Buttons
When you select media that is on the timeline, whether it's a video clip, image,
audio clip, effect, title, etc., several function buttons display above the timeline.
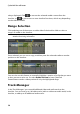
These buttons let you perform a variety of tasks or gain access to some important
features of CyberLink PowerDirector.
The function buttons that are available depend on the type of media content you
select. However, whenever you select media, the and buttons are