
Operation Manual


15
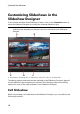
PowerDirector Editing M odes
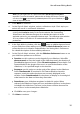
Note: you can right click on a photo and select Set 3D Source Format if
required. For more information, please refer to Setting 3D Source Format. You
can also click to remove any unwanted photos from your slideshow, or to
clear all imported photos.
3. Click Next to continue.
4. In the Style & Music window, select a slideshow style. Each style you
select will result in a different slideshow.
Note: you can fully customize your slideshow in the Slideshow Designer by
clicking the Customize button in the Preview window. See Customizing
Slideshows in the Slideshow Designer for a detailed description of all the
available options for your selected slideshow style. The slideshow styles with the
3D icon produce a 3D effect in 3D mode and when outputted in 3D video
productions.
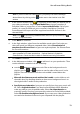
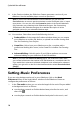
5. In the Style & Music window, click the button to add background music
to your slideshow. After adding music, click the Music Preferences button to
customize the music duration and add fades. See Setting Music Preferences
for a detail description of the available preferences.
6. In the Style & Music window, click the Slideshow Preferences button to set
your slideshow preferences as follows:
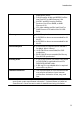
Duration: use this option to set the length of your slideshow. Select Fit
photos to music to have the length of the slideshow match the duration of
the added background music. Select Fit music to photos (if launched in Full
Feature Mode) for the length of the music to match the duration of the
slideshow, i.e. its specified length on the timeline.
Sequence: use this option to set the order of the photos in the slideshow.
Select Timeline order (if launched in Full Feature Mode) to have the
sequence match the order the photos are currently displayed in the
timeline. Select Date/time taken for the photos to display in chronological
order based on the date and time they were taken.
Detect faces: some slideshow templates include this option. When
selected, the Slideshow Creator will scan and detect the faces in the photos
included in the slideshow. The faces in the photos will then become the
area of focus in the created photo slideshows.
Click OK to save your changes.
7. Click Next to continue.