
Operation Manual


101
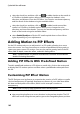
Creating PiP Effects
in the PiP Objects room, click on to create a new PiP object template from
scratch by importing a custom image.
in the PiP Objects room, select an existing PiP object and then click on to
edit the existing template.
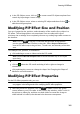
Modifying PiP Effect Size and Position
You can change the size, position, and orientation of the media clip or object in a
PiP effect. The resizing options are unrestricted. You can reduce the clip to
miniature size or enlarge it to completely obscure any underlying media content on
the timeline.
Note: click on to use the TV safe zone and grid lines to help with the
precise placement of the PiP effect on the video. Select Snap to Reference to
have the PiP effect snap to the grid lines, TV safe zone, and boundary of the video
area.
To modify its size, position, or orientation:
click and drag a corner or side to resize the PiP media.
Note: deselect M aintain aspect ratio to resize the media clip or PiP object
more freely.
click on the PiP media and drag it to a new position.
click on above the PiP media and drag it left or right to change its
orientation.
click and drag the corners to change its shape. See Changing the Shape of
Media for more information.
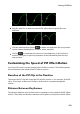
Modifying PiP Effect Properties
On the PiP effect properties tab, you can:
Note: select the Only show the selected track option to hide any media that
may appear in the background while modifying the PiP effect properties.
select the check box and then click on to add a chroma key (green
screen) effect to your PiP media. In the chroma key window, select a color in
the picture or video clip, and then use both sliders to reveal the image or
video behind it. In effect, the selected color becomes transparent.