
Operation Manual

43
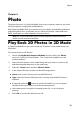
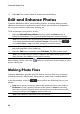
Photo
Red-eye: select this option to remove unwanted red-eye from your photos.
Just follow the instructions on the user interface to use this feature.
Straighten: if your photo was taken unevenly and appears to be crooked,
select this option and use the Degree slider to make it more level.
Auto Brightness: select to automatically adjust the photo’s brightness.
Auto Contrast: select to automatically adjust the photo’s contrast.
Auto Balance: select to automatically adjust the photo’s color balance.
Auto Fix Lighting: select to automatically fix the lighting within the photo.
Select Close to save the changes to your photo, and then Back to return to the
main media window.
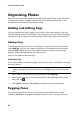
Fine Tuning Photos
Use the fine tune function in the Edit window to manually adjust the Brightness,
Contrast, Saturation, White balance or Sharpness of photos. Select the tab
and use the sliders to adjust the photo’s properties as required.
Select Close to save the changes to your photo, and then Back to return to the
main media window.
Adding Photo Effects
CyberLink MediaShow lets you add display and color effects to photos. Select the
tab to apply the following effects to photos in the media library.
Black & White: converts color photos to black and white.
Sepia: applies a dark brown-grey hue that resembles the effect of aging on
old photographs.
Matte: adds a white matting to photos. Select and drag the focus to an area of
the photo, and then use the slider to increase or decrease the matting size.
Vignette: use your mouse to set the focus area of the vignette on the photo,
and then use the slider to adjust its Size.
Soft Focus: with your mouse, select the focus area for the effect, and then use
the sliders to adjust the effect’s Size and amount of blur (Soft) used.