
Operation Manual

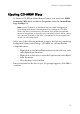

Table Of Contents

CyberLink InstantBurn
10
Formatting a Disc
Before you begin, check that the InstantBurn icon is in the task
tray in the bottom right of the screen.
1. Insert a blank unformatted disc into the drive. Right click on the
InstantBurn icon in the task tray in the bottom right of the screen
and select Format from the menu. Click Next.
Note: InstantBurn enables you to save data on a CD, DVD, BD or
HD DVD. Once you format a disc with InstantBurn, you can only
use it with InstantBurn. If you want to create an audio CD or a
DVD-Video, DO NOT format the disc. Use Power2Go.
2. Select the drive in which the disc to be formatted was inserted,
then click Next.
3. Click Properties to check the disc properties. If everything is OK,
click Next.
4. Input the volume label, then click Finish. You can change the
volume label after the disc has been formatted.
Note: The volume label is a maximum of 11 characters. You
cannot use spaces in the label. When formatting a DVD, you can
also select the UDF version. Version 1.50 is most commonly used,
so there is usually no need to change this setting.
5. Click OK on the confirmation prompt that appears to start
formatting.
Note: You cannot use the formatted disc with Power2Go or other
burning software.