
Operation Manual


89
M ix Room
simultaneously. Click to configure the recording settings by
selecting the import source for the recorded audio, and whether you
want to monitor the input.
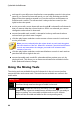
Click this button to mute the corresponding audio track. If you only
want to mute one single clip on an audio track, just right click on it and
then select Mute Clip (or click on the selected clip).
Select this button if you only want to hear the audio in the
corresponding track when previewing the audio mix. You can enable as
many tracks as you want. All the tracks where is not selected are
muted during the preview.
Click to modify the master volume for the audio file on the selected
track using volume keys at specific points. See Adjusting the Master
Volume for detailed information on modifying master volume keys.
Click to modify the balance of the audio file on the selected track by
panning the audio left or right. See Panning Audio L/R for detailed
information on panning audio.
Use the slider to the right of this icon to set the audio input level for
the entire duration of the track.
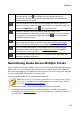
Normalizing Audio Across Multiple Tracks
If you find that some of the audio in your mix is much louder than the audio on the
other tracks, you can normalize the volume across multiple tracks. Normalizing is
the process of applying a constant amount of gain to your mix to bring the average
or peak amplitude (volume levels) to a same level.
To normalize the audio across multiple tracks, do this:
Note: this section is for normalizing the audio across multiple tracks in the
Mix room. For information on normalizing the audio in the Edit and Restore
rooms see Normalizing Audio Channels.
1. Select the all of the tracks in the mix that you want to normalize.
2. If required, use range selection to select the portion of audio you want to
normalize. See Range Selection for more information on selecting a range of
an audio file.