
Operation Manual


49
Editing Audio
select, the more dense sounding the phase effect will be.
Delay depth: use the slider to set how much the filters sweep below the
source frequency. The larger the delay depth, the more of a trembling effect it
will have on the audio.
Modulation rate: use the slider to control how quickly (measured in hertz, or
cycles per second) the filters sweep to and from the source frequency of the
audio.
Feedback: use the slider to set the percentage of the phaser output that is fed
back in to the original audio. A negative value will invert the phase waveform
before feeding the audio back, reducing the loudness of the audio.
Dry-Wet mix: use the slider to set the ratio between the dry (original audio)
and wet (modified/filtered sound) audio. Dragging the slider to the left
provides more of the original audio in the mix, while to the right adds more
of the modified audio.
7. If required, you can preview how the applied effect will sound by selecting
Adjusted result and then clicking the play button on the playback controls.
Select Original audio if you want to play the original audio.
8. Click Apply to add the phase effect to the audio.
Note: if required, click on the Effect tab to see the applied effect in the edit
panel. See Effect Tab for more information.
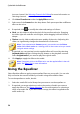
Creating a Flange Effect
The flange effect is a time delay effect that is created by mixing two audio channels
together, after performing a phase shift on one of the channels and then slightly
delaying its signal. This produces a subtle swirling or psychedelic sound effect in
the audio.
To add a flange effect to audio, do this:
1. Select the media file in the library that you want to apply the flange effect to.
2. If required, use range selection to select the portion of audio you want to
apply the effect to. See Range Selection for more information on selecting a
range of an audio file. If you don't select a range, the effect is applied to the
entire audio clip.