CyberLink AudioDirector User's Guide
Copyright and Disclaimer All rights reserved. To the extent allowed by law, AudioDirector IS PROVIDED “AS IS”, WITHOUT WARRANTY OF ANY KIND, EITHER EXPRESS OR IMPLIED, INCLUDING WITHOUT LIMITATION ANY WARRANTY FOR INFORMATION, SERVICES, OR PRODUCTS PROVIDED THROUGH OR IN CONNECTION WITH AudioDirector AND ANY IMPLIED WARRANTIES OF MERCHANTABILITY, FITNESS FOR A PARTICULAR PURPOSE, EXPECTATION OF PRIVACY, OR NON-INFRINGEMENT.
Contents ..................................................1 Introduction Welcome ................................................................................................1 Latest .................................................................................................1 Features DirectorZone .................................................................................................2 and CyberLink Cloud AudioDirector .......................................................................
CyberLink Audio Directo r Importing..................................................23 Media Importing ................................................................................................23 Audio and Video Files Supported .................................................................................................23 Formats Downloading ................................................................................................24 Audio and Sound Clips Downloading .......................
Adding .................................................................................................47 Reverb Creating .................................................................................................48 a Phase Effect Creating .................................................................................................49 a Flange Effect Adding .................................................................................................51 a Chorus Effect Adding ...................
CyberLink Audio Directo r Applying .................................................................................................92 Audio Effects in the Mix Room Producing..................................................95 the Audio Supported ................................................................................................95 Formats Producing ................................................................................................95 Audio Producing ...............................
Intro ductio n Chapter 1: Introduction This chapter introduces the CyberLink AudioDirector program and includes an overview of its features. It also outlines the recommended system requirements for running the program. Note: this document is for reference and informational use only. Its content and the corresponding program are subject to change without notice. Welcome Welcome to the CyberLink family of digital software programs.
CyberLink Audio Directo r Cloud storage service. DirectorZone and CyberLink Cloud You can upload/download sound clips, and back up media, preferences, projects, and more with the DirectorZone and CyberLink Cloud features. DirectorZone DirectorZone is a web service that lets you download sound clips created by other users, so you can use them in your audio. You may also share your own custom sound clips by uploading them to DirectorZone.
Intro ductio n AudioDirector Live AudioDirector Live is a subscription based version of CyberLink AudioDirector that provides all the audio editing features you expect, and adds the CyberLink Cloud storage service and more. With a AudioDirector Live subscription, you get: All the advanced audio editing features of the Ultra version of CyberLink AudioDirector. The ability to back up program preferences, projects, and sound clips on the cloud storage space CyberLink Cloud.
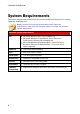
CyberLink Audio Directo r System Requirements The system requirements listed below are recommended as minimums for running CyberLink AudioDirector. Note: to ensure you can enjoy all the features within CyberLink AudioDirector, make sure your computer meets or exceeds the minimum system requirements. Minimum System Requirements 4 OS Microsoft Windows 8/8.1 (32 bit and 64 bit). Microsoft Windows 7 Home Basic, Home Premium, Professional, Ultimate (32 bit and 64 bit).
Audio Directo r Wo rkspace Chapter 2: AudioDirector Workspace This chapter provides a complete overview of the CyberLink AudioDirector workspace. It also takes you through the settings used to customize the program to your preference.
CyberLink Audio Directo r Edit: in this room you can adjust, trim, cut, and enhance digital audio, and much more. See Editing Audio for more information. Restore: in this room you can repair audio clips using the Click Removal, Clipping Removal, and Noise Reduction features, or manually fix audio using the Visual Repair. See Restoring Audio for more information. Mix: in this room you can record and mix multiple audio tracks into one customized audio file. See Mixing Audio for more information.
Audio Directo r Wo rkspace Note: the timeline can display up to 8 channels (7.1 channel). See Audio Channels for more information. By default, the values along the top represent the playback time, while the values along the right indicate the audio intensity, or loudness, measured in decibels. Note: you can switch the view of the timeline by clicking the buttons in the top right corner of the program. See Timeline View for more information.
CyberLink Audio Directo r Audio Channels When a media file is selected in the library, CyberLink AudioDirector displays all of its audio channels in the timeline. The timeline can display up to eight channels, and supports the following audio channel configurations: 7.1 surround sound (8 channels). 5.1 surround sound (6 channels). stereo (2 channels). mono (1 channel). Note: CyberLink AudioDirector supports the import and edit of audio and video files with 5.1 channel audio.
Audio Directo r Wo rkspace Ls Side left Rs Side right TpC Top center TpFL Top front left TpFC Top front center TpFR Top front right TpBL Top back left TpBC Top back center TpBR Top back left Note: the type of channel that is available in the selected media file is completely dependent on the audio configuration of the file. Selecting Channels for Editing When you are editing and restoring audio in CyberLink AudioDirector, you can choose to apply the edits, effects, fixes, etc.
CyberLink Audio Directo r You can also click and drag on the waveform directly to select a range of the audio. Note that when you select a range of the audio, the editing tools on the AudioDirector quick bar become active. See Using the Editing Tools for detailed information about using each of these tools. Details about the selected range are indicated in the Start, End, and Length fields below the timeline.
Audio Directo r Wo rkspace view is a visual representation of both the time and the audio intensity (or loudness, measured in decibels) of the audio in each channel. Spectral Frequency View The spectral frequency view is a graphical representation of the audio in each channel, and is ideal when using the Visual Repair feature. The colored graph you see in this view is a three dimensional illustration of the audio attributes in the selected media file.
CyberLink Audio Directo r Timeline Markers When editing, restoring, or mixing audio, click to add a timeline marker at the current position of the timeline slider. Markers are used to mark the positions in your audio files where you might want to edit the audio file or start an effect from. In the Mix room, use markers when adding audio clips as they will snap to the timeline markers. Adding Timeline Markers To add a timeline marker, do this: 1.
Audio Directo r Wo rkspace seconds in an audio clip. Vertical Zoom Vertical zoom lets you increase/decrease the intensity magnification of the audio in the timeline. Use these zoom controls if you want to, for example, zoom in on a specific noise to get a closer look at the waveform. AudioDirector Quick Bar The AudioDirector quick bar offers you several tools you can access in all the rooms. Depending on which room you are in, the buttons on the quick bar differ.
CyberLink Audio Directo r In the Edit, Restore, and Mix rooms you can click on this button to paste the audio wave form you cut or copied to the right of the current timeline position. See Using the Editing Tools for more detailed information. In the Edit, Restore, and Mix rooms you can click on this button to delete a selected portion of the audio file. See Using the Editing Tools for more detailed information.
Audio Directo r Wo rkspace Playback Controls Once media is imported into the program, use the available playback controls to preview it. To preview a file, select it in the media library and then use the controls as follows: Playback Controls Click to play the audio from the current position to the end of the track. Click to pause playback. Click to stop playback. If is displayed, the current audio file plays to the end of the track.
CyberLink Audio Directo r During playback, you can: click to minimize the video preview window. Click to restore it. click to undock the preview window if you would like a larger preview that you can resize to your preference.
Audio Directo r Wo rkspace the video preview window also includes slightly different playback controls, that include the and buttons you can use to step backwards or forwards one frame when the video is paused. click to re-dock the preview window to the bottom left. Audio Level Meter Use the audio level meter to view the audio level, or loudness in decibels, of the current clip at different moments in time during playback.
CyberLink Audio Directo r There are also audio level meters for each track in the Mix room's mixer panel. See Mixer Panel for more information. Expanding the Workspace You can adjust the CyberLink AudioDirector workspace to fit your editing requirements. For example, you can expand out the adjustment and effects panel to get better look at all the available controls, if required.
Audio Directo r Wo rkspace You can also expand the keyframe panel for a better view when adjusting the master volume and panning audio left or right. Doing so, reduces the width of the audio tracks in the timeline.
CyberLink Audio Directo r If you have lots of media in the library, you can expand it to view all the files.
Audio Directo r Wo rkspace Keyframes Panel The keyframes panel provides powerful and precise editing tools in the Edit room. On the Volume tab you can adjust the master volume of audio, or pan audio to the left or right channel. On the Effect tab, you can precisely apply multiple effects to a single audio clip. Volume Tab On the Volume tab on the keyframes panel, you can adjust the master volume and pan audio the left or right.
CyberLink Audio Directo r to remove effects, hover your mouse over the effect on the tab and then click on the individual effect. Click to the right of the panel to remove all the similar effects from the entire timeline.
Im po rting M edia Chapter 3: Importing Media You can import both audio and video files from your hard drive or from a removable device, into CyberLink AudioDirector. You can also record your own custom audio, or download sound clips from DirectorZone directly into the library. Note: when media is imported into the library, CyberLink AudioDirector creates a temp working file for each file. It uses the file to log the edits and changes you want to make to the original files.
CyberLink Audio Directo r Note: CyberLink AudioDirector supports the import and edit of audio and video files with 5.1 channel audio. It also supports the import of audio and video files with 7.1 channels, but only for .WAV audio files are all 8 channels displayed in the program and available for editing. For video files with 7.1 channel audio, two of the audio channels (BL/BR) are hidden and unavailable for editing.
Im po rting M edia My DirectorZone Sound Clips In the My DirectorZone window you can conveniently download your custom sound clips that you previously uploaded to DirectorZone. You can also access and download sound clips from your DirectorZone download history and also your favorite sound clips. To download My DirectorZone sound clips, do this: 1. Click on the button. 2. Click the My DirectorZone tab. 3.
CyberLink Audio Directo r Sound Clips Library Click the button to open the sound clips library of CyberLink AudioDirector. In the sound clips library you can manage and organize the clips you downloaded from DirectorZone and CyberLink Cloud*. Note: * CyberLink Cloud is a cloud service from CyberLink that is currently only available to users who have a subscription to AudioDirector Live. In the sound clips library you can: view sound clips by category. preview the sound clips in the library.
Im po rting M edia Recording Settings Set your recording settings as follows: Devices: select the import source, or audio device, you want to use to record audio with by doing one of the following: Microphone: select this option and then the microphone from the list if you want to record from a connected microphone. What You Hear: select this option to loop back and record the audio that you are hearing on your computer.
CyberLink Audio Directo r 28
Audio Directo r Pro jects Chapter 4: AudioDirector Projects When editing, restoring, and mixing audio in CyberLink AudioDirector, click the button to save your work as a project in the .ads file format, which is used exclusively by CyberLink AudioDirector. Note: a CyberLink AudioDirector project (.ads) file essentially contains a list of the audio and video files in the library, and that you are editing or mixing.
CyberLink Audio Directo r Note: * CyberLink Cloud is a cloud service from CyberLink that is currently only available to users who have a subscription to AudioDirector Live. CyberLink Cloud Projects If you have a CyberLink Cloud subscription you can select File > Upload Project to CyberLink Cloud to store project files on the CyberLink Cloud service from CyberLink.
Editing Audio Chapter 5: Editing Audio Once you import media into the library, you can start editing its audio in the Edit room. In the Edit room you can use the editing tools to crop and trim the audio, or use the adjustment options to change audio length, pitch, apply fades, and much more. You can also apply rich audio effects to audio to enhance it, or to achieve a desired result. If required, click the Edit button to begin editing, adjusting, and applying effects to audio.
CyberLink Audio Directo r from Living Room, Theater, or Stadium. 4. Click OK to apply the changes. Using the Editing Tools Use the editing tools on the AudioDirector quick bar to crop, trim, and even add portions (using the paste function) to your audio. To edit an audio file, do this: 1. Click the Edit button to open the edit audio room. 2. Select the media file in the library that you want to edit. 3. Decide whether you want to perform the edits on all the available channels, or just one channel.
Editing Audio Normalizing is the process of applying a constant amount of gain to your audio file to bring the average or peak amplitude (volume levels) to a same level. To normalize the audio channels for a media file, do this: Note: this section is for normalizing the audio across all channels in the Edit and Restore rooms. For information on normalizing the audio in the Mix room see Normalizing Audio Across Multiple Tracks. 1.
CyberLink Audio Directo r information on selecting channels. 4. Use range selection to select the portion of audio you want to boost. See Range Selection for more information on selecting a range of an audio file. Note: the entire audio file's waveform is selected by default when this feature is opened. If you want to apply this feature to the entire audio file, you do not need to use range selection when the entire waveform is selected. 5.
Editing Audio by default the fade in duration is 5 seconds. To change the duration, click and drag the grey square to the desired time you want the fade to end, i.e the audio to be at full volume. 5.
CyberLink Audio Directo r 6. If required, you can preview how the adjusted audio will sound by selecting Adjusted result and then clicking the play button on the playback controls. Select Original audio if you want to play the original audio. 7. Click Apply to apply the fade. Trimming Audio Use the Trim Audio feature to trim out unwanted portions from your media clip's audio. To trim audio, do this: 1. Select the media file in the library that you want to trim. 2.
Editing Audio 4. Use range selection to select the portion of audio you want to trim. See Range Selection for more information on selecting a range of an audio file. 5. Select the Mode of trimming you want to perform as follows: Remove selected part: select if you want to trim out the part you selected in the previous step. Keep selected part: select if you want to keep the part you selected in the previous step, removing the portions on either side.
CyberLink Audio Directo r Note: if required, you can use both the New audio length and Stretch ratio features together to adjust the length of the audio. 6. Select the Keep pitch option to have CyberLink AudioDirector maintain the pitch of the original audio, so that the adjusted result does not sound sped up or slowed down. Note: Keep pitch is only available if the change to the audio's length is between 0.5X and 2X. 7.
Editing Audio 6. If required, you can preview how the adjusted audio will sound by selecting Adjusted result and then clicking the play button on the playback controls. Select Original audio if you want to play the audio at its original pitch. 7. Click Apply to adjust the pitch of the audio. Inserting Silence Use the Insert Silence feature to add a specified amount of silence into audio clips.
CyberLink Audio Directo r 4. Drag the timeline slider to the position in the audio clip where you want to insert the noise. 5. Select one of the following types of noise from the Noise type drop-down: Normal: common white noise, or static, which can be quite loud to the listener. Pink: static like noise that sounds softer and quieter than normal white noise. Brown: a lower frequency static like noise, which is quite quiet compared to the others. 6.
Editing Audio Adjusting the Master Volume CyberLink AudioDirector lets you adjust the volume of an audio file at any point in the timeline. You can make it louder at a certain moment, and then quieter at another, as required. To adjust the master volume of an audio file, do this: 1. Use the playback controls or drag the timeline slider to the position where you want the audio to reach its loudest/quietest point. 2.
CyberLink Audio Directo r information. Panning Audio Left/Right CyberLink AudioDirector lets you adjust the balance of audio by panning it to the left or right channel, reducing the volume of the audio in the respective channel. To pan the audio, do this: Note: when panning 5.1 or 7.1 audio, the center channels are not affected. 1. Use the playback controls or drag the timeline slider to the position where you want to start panning the audio. 2.
Editing Audio Applying Audio Effects In CyberLink AudioDirector you can choose from a number of default effects and apply them to your audio files. You can also import custom VST plugin effects that you downloaded and apply them to your audio. Note: when you apply effects to audio, they are not applied to the original file, as you must produce it as a new file in the Produce window. See Producing the Audio for more information.
CyberLink Audio Directo r Gate/Expander: use these sliders to boost (expand) the level of soft signals. Note that the expander can have a ratio greater or less than 1.0. When the ratio is greater than 1, it is operating as a gate and any signals below the threshold will be decreased in volume. 6. Use the Output Gain slider to adjust the output gain for the processed file to make up for a decrease in the audio's volume. 7.
Editing Audio Release: use to set how quickly the module stops applying compression, limiting or expansion/gating when the signal falls below the threshold. Adding Delays Use the Delay effect to add analog and tape-style echoes to your tracks. This vintage gear-inspired delay unit has unique features, including a delay meter that lets you see and adjust the level and spacing of each echo generated. To add a delay to audio, do this: 1.
CyberLink Audio Directo r Dry Out: sets the output gain of the dry signal without delay added to the signal. Wet Out: sets the output gain of the wet/delayed signal. Feedback: sets the gain of the delay feedback. Higher values will result in longer audible feedback times, i.e. more repeats. Trash: sets the amount of degradation for the delay. For example, higher Trash values for tape delays results in more saturation. Higher Trash values for lo-fi digital delays results in more bit truncation and aliasing.
Editing Audio Note: if required, click on the Effect tab to see the applied effect in the edit panel. See Effect Tab for more information. Adding Reverb Use Reverb to apply an effect that reverberates the original audio, i.e. applies an echo-like effect to it. To add reverb to audio, do this: 1. Select the media file in the library that you want to apply the reverb effect to. 2. If required, use range selection to select the portion of audio you want to apply the effect to.
CyberLink Audio Directo r the perceived distance of the audio from the listener, giving the audio spatial depth. 7. If required, you can preview how the applied effect will sound by selecting Adjusted result and then clicking the play button on the playback controls. Select Original audio if you want to play the original audio. 8. Click Apply to add the reverb effect to the audio. Note: if required, click on the Effect tab to see the applied effect in the edit panel. See Effect Tab for more information.
Editing Audio select, the more dense sounding the phase effect will be. Delay depth: use the slider to set how much the filters sweep below the source frequency. The larger the delay depth, the more of a trembling effect it will have on the audio. Modulation rate: use the slider to control how quickly (measured in hertz, or cycles per second) the filters sweep to and from the source frequency of the audio.
CyberLink Audio Directo r Note: the entire audio file's waveform is selected by default when this feature is opened. If you want to apply this feature to the entire audio file, you do not need to use range selection when the entire waveform is selected. 3. Decide whether you want to apply the effect on all the available channels, or just one channel. See Selecting Channels for Editing for more information on selecting channels. 4. Click Flanger under the Apply Effect section. 5.
Editing Audio Note: if required, click on the Effect tab to see the applied effect in the edit panel. See Effect Tab for more information. Adding a Chorus Effect In CyberLink AudioDirector you can make your audio sound richer by adding a chorus effect to it. This is done by adding some delays and feedback, so it sounds as if multiple audio sources, voices, or instruments are playing together. To add a chorus effect to audio, do this: 1.
CyberLink Audio Directo r audio. Decay: use the slider to set the amount of decay on the effect, or the relative strength/amplitude (to the original) of the copied effect. Adjusting this option can greatly intensify the effect. Dry: use this slider to set the amount of original audio that will be in the adjusted audio. Wet: use the slider to set the amount of wet (audio with chorus effect applied) audio that will be in the adjusted audio. 7.
Editing Audio down. Select the preset that best suits the sound you want to achieve. 6. If required, click to modify the advanced settings as follows: Initial delay time: use this slider to set how far behind, in milliseconds, the audio with the echo effect applied will start behind the original audio signal. Feedback: use this slider to set the ratio that determines how long the echoed sound will last.
CyberLink Audio Directo r just one channel. See Selecting Channels for Editing for more information on selecting channels. 4. Click Vocal Transformer under the Apply Effect section. 5. Select one of the Presets from the drop down. Each preset provides a different effect to the voice. 6. If required, click to modify the advanced settings as follows: Pitch: use this slider to adjust the pitch of the transformed voice.
Editing Audio Note: the entire audio file's waveform is selected by default when this feature is opened. If you want to apply this feature to the entire audio file, you do not need to use range selection when the entire waveform is selected. 3. Decide whether you want to apply the effect on all the available channels, or just one channel. See Selecting Channels for Editing for more information on selecting channels. 4. Click Equalizer under the Apply Effect section to open the Equalizer window. 5.
CyberLink Audio Directo r selecting channels. 4. Click Radio under the Apply Effect section. 5. Select the Radio type from the drop down. Each type provides a slightly different effect to your audio. 6. If required, you can preview how the applied effect will sound by selecting Adjusted result and then clicking the play button on the playback controls. Select Original audio if you want to play the original audio. 7. Click Apply to apply the radio effect to the audio.
Editing Audio 7. Click Apply to apply the phone effect to the audio. Note: if required, click on the Effect tab to see the applied effect in the edit panel. See Effect Tab for more information. Applying a Noise Gate Apply the noise gate if you want to control the volume of a media file's audio signal by blocking audio that falls below a specified threshold or decibel level. The resulting audio can then be processed differently from the original audio. To apply a noise gate to audio, do this: 1.
CyberLink Audio Directo r 7. If required, you can preview how the applied effect will sound by selecting Adjusted result and then clicking the play button on the playback controls. Select Original audio if you want to play the original audio. 8. Click Apply to add the noise gate to the audio. Note: if required, click on the Effect tab to see the applied effect in the edit panel. See Effect Tab for more information.
Editing Audio Applying VST Effects VST plug-in effects are the industry standard for audio processing software. You can purchase, download and then import VST effects into CyberLink AudioDirector for use. Note: check the associated documentation for each VST plugin effect for detailed information on using these effects. Importing VST Effects With VST plug-in effects you can find and add the desired custom effect you want on your audio.
CyberLink Audio Directo r 60
Resto ring Audio Chapter 6: Restoring Audio Click on the Restore button to repair audio clips using the Noise Reduction, Clipping, Click, Hum, or Hiss Removal features. You can also do more precise and powerful fixing using Visual Repair. Note: when you are repairing audio, the fixes are not applied to the original file, as you must produce it as a new file in the Produce window. See Producing the Audio for more information.
CyberLink Audio Directo r Time Selection The time selection tool lets you select a vertical area of the audio clip based on playback time. This selection tool is similar to the range selection. To use the time selection tool, do this: 1. In the Visual Repair section, click on the button. 2. Click and drag on the region of the audio clip you want to repair. CyberLink AudioDirector vertically selects the all of the content in the region for fixing.
Resto ring Audio 3. Click the button to preview only the selected content to ensure it is what you need to fix. 4. Use the visual repair functions to repair the audio as required. See Repairing the Audio for more information.
CyberLink Audio Directo r Time Frequency Selection Use the time frequency selection tool to choose a more precise area of the audio, by selecting a rectangular region for fixing. To use the time frequency selection tool, do this: 1. In the Visual Repair section, click on the button. 2. Click and drag on the region of the audio clip you want to repair. CyberLink AudioDirector highlights the content in a rectangle for fixing.
Resto ring Audio 3. Click the button to preview only the selected content to ensure it is what you need to fix. 4. Use the visual repair functions to repair the audio as required. See Repairing the Audio for more information.
CyberLink Audio Directo r Frequency Selection The frequency selection tool lets you select a horizontal area of the audio clip based on its frequency. To use the frequency selection tool, do this: 1. In the Visual Repair section, click on the button. 2. Click and drag on the region of the audio clip you want to repair.
Resto ring Audio 3. Click the button to preview only the selected content to ensure it is what you need to fix. 4. Use the visual repair functions to repair the audio as required. See Repairing the Audio for more information.
CyberLink Audio Directo r Magic Wand Selection The magic wand selection tool helps you to auto select similar attributes (frequency or amplitude) in the audio clip that may be the area that requires fixing. To use the magic wand selection tool, do this: 1. In the Visual Repair section, click on the button. 2. Click on the regions of the audio clip you want to repair. CyberLink AudioDirector auto selects the similar attributes (frequency or amplitude) for fixing.
Resto ring Audio 3. If required, you can select the Harmonic finder option to have CyberLink AudioDirector auto select the attributes that have similar harmonic qualities.
CyberLink Audio Directo r 4. Click the button to preview only the selected content to ensure it is what you need to fix. 5. Use the visual repair functions to repair the audio as required. See Repairing the Audio for more information.
Resto ring Audio Brush Selection You can use the brush selection tool to select, or brush, just the parts of the audio clip you want to repair. To use the brush selection tool, do this: 1. In the Visual Repair section, click on the button. 2. Use the Size slider to set the width of the area selected by the brush. 3. Click, hold down the mouse button, and then drag the mouse over the all regions of the audio clip you want to repair. Let go of the mouse button to finalize the selected area.
CyberLink Audio Directo r 4. Use the visual repair functions to repair the audio as required. See Repairing the Audio for more information. Repairing the Audio Once you have selected the portion of the audio that you want to repair, use one of the following functions to fix it as required. Auto Attenuate The auto attenuate function automatically levels off the selected audio so that it has the same attributes as the surrounding audio. To apply auto attenuate, do this: 1.
Resto ring Audio 2. If required, you can preview the repaired audio by selecting Restored result and then clicking the play button. Select Original audio if you want to play the original audio. 3. Click Apply to repair the selected audio. Manual Attenuate The manual attenuate function lets you manually level off the selected audio so that it has the same attributes as the surrounding audio. To apply manual attenuate, do this: 1. Select the Manual attenuate function. 2.
CyberLink Audio Directo r Using Noise Reduction Use the Noise Reduction feature if your audio contains unwanted static, or other background noise. There are two types of noise reduction available: Auto Denoise and Noise Reduction. To remove unwanted noise in your audio, do this: 1. Select the media file in the library that you want to remove audio from. 2. Decide whether you want to remove it from all the available channels, or just one channel.
Resto ring Audio keep. 3. If required, you can preview the repaired audio by selecting Restored result and then clicking the Preview button. Select Original audio if you want to play the original audio. 4. Click Apply to repair the audio. Noise Reduction To use the Noise Reduction on audio, do this: 1. In step 1, do one of the following: Select the first option and then select a range of the audio that only contains the noise, i.e. devoid of the audio you want to keep in the file.
CyberLink Audio Directo r Analyzed range only: select this option to only apply the noise reduction to the range of audio you selected and analyzed in step 1. Entire audio content: select this option if you want to apply the noise reduction to the entire audio clip. Select a different range: select this option to select a new range of audio where you want the noise reduction applied. This range can contain both the noise and the audio content you want to keep. 6.
Resto ring Audio selected, the more attenuation that is applied to the audio, and the lower its resulting intensity or loudness. 6. If required, you can preview the repaired audio by selecting Restored result and then clicking the play button. Select Original audio if you want to play the original audio. 7. Click Apply to repair the audio. Using Click Removal Use the Click Removal feature if your audio clips contain unwanted clicking or related sounds in them.
CyberLink Audio Directo r Using Hum Removal The Hum Removal feature removes hum noise and its harmonics from audio clips. Hum noise is usually caused by electronics (faulty microphone, electrical interference with recording device, etc.) during the original recording. To use Hum Removal on audio, do this: 1. Select the media file in the library that you want to repair. 2. If required, use range selection to select the portion of audio you want to repair.
Resto ring Audio Remove 50Hz: select this option to remove all audio that is in the 50Hz frequency range band. Remove 50Hz and the harmonics: select this option to remove all audio that is in the 50Hz frequency range band. This option will also remove any corresponding harmonics. Remove 60Hz: select this option to remove all audio that is in the 60Hz frequency range band. Remove 60Hz and the harmonics: select this option to remove all audio that is in the 60Hz frequency range band.
CyberLink Audio Directo r 2. If required, use the following sliders to further remove the hum from the audio: Base frequency: use this slider to manually specify the root note of the hum noise, if the detected hum is incorrect. Reduction level: use this slider to set the amount of attenuation applied on the hum noise. Number of harmonics: select the number of harmonics the hum noise appears to have. Filter bandwidth: use this slider determine the width of the root frequency and its harmonics.
Resto ring Audio Using Hiss Removal The Hiss Removal feature removes hiss noise from audio clips. To use Hiss Removal on audio, do this: 1. In step 1, do one of the following: Select the first option and then select a range of the audio that only contains the hiss you want to remove, i.e. devoid of the audio you want to keep in the file. See Range Selection for more information on selecting a range of an audio file. Next, click the Analyze button to analyze the range of audio.
CyberLink Audio Directo r selecting one of the following: Selected range only: select this option to only apply the hiss removal to the range of audio you selected and analyzed in step 1. Entire audio content: select this option if you want to apply the hiss removal to the entire audio clip. Select a different range: select this option to select a new range of audio where you want the his removal applied. This range can contain both the hiss and the audio content you want to keep. 5.
M ix Ro o m Chapter 7: Mix Room In the Mix room you can mix audio together to create customized audio files. You can also create soundtracks for videos, by mixing audio with videos added to the video track. Click the Mix button to open the Mix room.
CyberLink Audio Directo r profile settings. See Configuring Audio Profile Settings for a description of each of the available profile settings. 2. Add the audio files that you want to include in the mix to the Mix room timeline. See Adding Media to Your Mix for more detailed information. For detailed information about the timeline in the Mix room, see Mix Room Timeline. 3. Position each added audio file to start precisely when you want it by dragging it to the desired starting position.
M ix Ro o m Configuring Audio Profile Settings Before creating your mix, click the button to configure the audio profile, or the quality and number of channels, of the audio file you are creating in the Mix room. The available options are as follows: Sample rate: select the sample rate from the drop-down that CyberLink AudioDirector will use by default when previewing audio in the mix room.
CyberLink Audio Directo r you cannot add audio to the Master Track directly, as it works as a guide for your audio mix project. It is visual representation for all the audio that is in your mix. if you want to apply audio effects to your entire mix, you can do so by selecting the Master Track. You can also use range selection to apply the effects to just a selected range. See Range Selection for more information on selecting a range of audio. you can add up to 100 audio tracks in the Mix room timeline.
M ix Ro o m A - Audio Tra cks in the Tim eline, B - Audio Tra ck M ode, C - Audio Tra ck Ba la nce, D - Audio Level M eter, E - M a ster Volum e Control, F - Expa nd a nd Scroll To use the mixer panel to mix your audio, do this: 87
CyberLink Audio Directo r each track in your Mix room timeline has corresponding controls in the mixer panel. If you cannot find an audio track, you can click and drag on the left edge of the mixer panel to expand it, or use the scroll bar at the bottom to find the track controls. The master track is always the last control (on the right) in the mixer panel. to mix your audio, ensure that audio track mode R is selected for all the tracks that you want to alter the volume levels on.
M ix Ro o m simultaneously. Click to configure the recording settings by selecting the import source for the recorded audio, and whether you want to monitor the input. Click this button to mute the corresponding audio track. If you only want to mute one single clip on an audio track, just right click on it and then select Mute Clip (or click on the selected clip). Select this button if you only want to hear the audio in the corresponding track when previewing the audio mix.
CyberLink Audio Directo r Note: be sure to select the entire audio file's waveform if you want to normalize the audio in the entire track. 3. Click the button to normalize the volume of the selected audio tracks. Using Audio Transitions When adding more than one audio clip onto a timeline track, you can use a transition to mix the two clips together. To use an audio transition, do this: 1.
M ix Ro o m Note: the maximum length of a smart audio transition is 30 seconds. If the duration of the overlap between the first and second audio clip is more than 30 seconds, then the Smart Transition option is not available. 3. Click OK to apply the audio transition between the two clips. Note: you can change the length of the audio transition by dragging the second clip and moving it to a new position. When using a crossfade, double click on the transition area to edit the transition's properties.
CyberLink Audio Directo r Scratch strength ratio: use the slider to set the strength of the record scratch during the transition. Tempo adjustment: First clip's estimated tempo: if required, use to adjust the tempo of the first clip. You can speed up or slow down the tempo, depending on the tempo of the second clip. Use 2X to double the clip's tempo, or 0.5X to halve it. Second clip's estimated tempo: if required, use to adjust the tempo of the second clip.
M ix Ro o m Note: in the Mix room, audio effects can only be applied to one audio clip on a track at a time, or to all the audio in the mix by selecting the Master Track. If you select more than one audio clip, the effects are not available. For information on the use of the Surround Sound Panner, see Using the Surround Sound Panner section below. Note: once an effect is applied to an audio clip, click on to view the Effect List for the click.
CyberLink Audio Directo r Note: you can select the Pan the audio twice (forward and backward) option if you want the audio to pan forward then backward along the template path. You can also indicated how many times you want the pan to Repeat by entering in the number of times in the field provided. 5. If required, click the Preview button to listen to how the applied effect will sound. 6. Click Apply to apply the pan effect to the audio.
Pro ducing the Audio Chapter 8: Producing the Audio The last step when editing, restoring, and mixing audio files is to save and produce it to a new file. CyberLink AudioDirector uses the original media and then applies all the specified changes to it, creating a new file, either in the same format, or in a new file format if you prefer.
CyberLink Audio Directo r Note: if there is a video file in the Mix room, or you are editing a video file's audio track (and you only want to output the edited audio), select Produce Audio after clicking the Produce button. 2. Set the File information as follows: File name: enter in a new file name for the file. Location: click on audio is saved.
Pro ducing the Audio Producing Video After you have edited the audio tracks of an imported video file, use the produce video function to re-render the video with the updated audio applied. This produce feature is also used when mixing down all the tracks in the Mix room, including a video track, and then combining them into a single video file with the mixed audio. To produce a video file, do this: 1.
CyberLink Audio Directo r drop-down. Bit depth: set the bit depth of the video's audio by selecting it from the dropdown. Channels: set the number of channels the video's audio will have. Depending on the video file format and audio codec specified, you can produce it with up to 5.1 channels, if required. 5. Click on Produce. The file is saved to the folder location specified and is also available in the media library.
Sharing and Backing Up Audio Chapter 9: Sharing and Backing Up Audio You can share the sound clips you create with other users by uploading them to DirectorZone. If you have a CyberLink Cloud subscription you can back up all your sound clips by storing them on CyberLink Cloud. The sound clips are first converted to 44100Hz, 16bit .MP3 stereo audio files before they are uploaded.
CyberLink Audio Directo r with the upload. 5. 100 Click on Close to close the upload window.
Creating CDs Chapter 10: Creating CDs Once you are done editing, restoring, and mixing your media files, you can use them to create CDs that are burned in the audio CD format. Note: you can add both audio and video files to the CD, however just the video file's audio is burned to the disc. To create a CD, do this: 1. Click the Create CD button to open the Create CD room. 2. Add tracks to the CD by dragging media from the media library to the CD track list view window.
CyberLink Audio Directo r gap in the field provided. 6. If required, use the playback controls at the bottom of the window to preview the entire CD before burning it to a disc. 7. When you are ready, put a blank CD in your burning drive, and then click the Burn Now button. 8. In the Burn Settings window, set the following options: Recording drive: select the burning drive CyberLink AudioDirector will use to burn the tracks to the CD. Recording speed: set the recording speed used when burning the CD.
Audio Directo r Preferences Chapter 11: AudioDirector Preferences Use the CyberLink AudioDirector preferences to select a UI language, set the default profile settings for audio files, and more. To configure your preferences in CyberLink AudioDirector, click the button. General Preferences In the Preferences window, select the General tab.
CyberLink Audio Directo r File Preferences In the Preferences window, select the File tab. The available options are as follows: File default profile settings: Sample rate: select the sample rate from the drop-down that CyberLink AudioDirector will use by default when producing audio. Bit depth: select the default bit depth from the drop-down that CyberLink AudioDirector will use when producing audio.
Audio Directo r Preferences DirectorZone Preferences In the Preferences window, select the DirectorZone tab. The available options are as follows: Auto sign in: Auto sign in to DirectorZone: select this option and then enter in your e-mail address and password to automatically sign in to DirectorZone when the program is opened. If you do not have a DirectorZone account, click on the Get an Account button.
CyberLink Audio Directo r Clear CyberLink Cloud cache: click the Clear Offline Cache button to free up some disk space by emptying the temp files stored when downloading content from CyberLink Cloud. Sign out from CyberLink Cloud service: if you are currently signed in to CyberLink Cloud, click the button to sign yourself out.
Audio Directo r Ho tkeys Chapter 12: AudioDirector Hotkeys The following is a list of the hotkeys available in CyberLink AudioDirector for your convenience: Hotkey Description Ctrl+N New project Ctrl+O Open project Ctrl+S Save project Ctrl+Shift+S Save project as Ctrl+Q Import media Space bar Play/Pause , Jump to Beginning .
CyberLink Audio Directo r 108
Licensing and Co pyright Info rm atio n Chapter 13: Licensing and Copyright Information This section contains the AudioDirector licensing and copyright information. iZotope Software Intellectual Property Notices and Legends: iZotope Noise Reduction, iZotope Delay, and iZotope Dynamics, iZotope®; © 2011 iZotope, Inc. All Rights Reserved. Dolby Laboratories Manufactured under license from Dolby Laboratories. Dolby and the double-D symbol are registered trademarks of Dolby Laboratories.
CyberLink Audio Directo r 110
Technical Suppo rt Chapter 14: Technical Support If you require technical support, then this chapter can help. It includes all the information you need to find the answers you are looking for. You may also find answers quickly by contacting your local distributor/dealer. Before Contacting Technical Support Before contacting CyberLink technical support, please take advantage of one or more of the following free support options: consult the user’s guide or the online help installed with your program.
CyberLink Audio Directo r a detailed description of the problem and under what circumstances it occurred. Web Support Solutions to your problems are available 24 hours a day at no cost on the CyberLink web site: Note: you must first register as a member before using CyberLink web support. CyberLink provides a wide range of web support options, including FAQs, in the following languages: Language Web Support URL English http://www.cyberlink.com/cs-help Traditional Chinese http://tw.cyberlink.
Technical Suppo rt Ask questions and get answers from our users on the CyberLink Community Forum: http://forum.cyberlink.com/forum/forums/list/ENU.page Note: CyberLink’s user community forum is only available in English and German.
CyberLink Audio Directo r 114
Index Index 5 5.1 8, 23 7 7.
CyberLink Audio Directo r account information 105 backing up sound clips 99 downloading sound clips 25 overview 2 pack project materials 29 preferences 105 projects 30 signing out 105 uploading audio 96 B Base frequency 80 Bit depth 31 Boost 33 C CDs creating 101 Change speed 37 Channels editing 9 normalizing 32 overview 8 panning 93 setting number of 31 Chorus effect 51 Click removal 77 Clipping removal 76 Compressor 43 Controls playback 15 zoom 12 Convert 95 audio 31 Create audio mix 83 CDs 101 discs 5
Index Dry-wet mix reverb 47 Dynamic range control 43 Filter bandwidth 80 Flanger 49 Frequency smoothing 81 E G Echo 47 adding 52 Edit audio 5, 31 tools 32 Effects 21 applying 43 chorus 51 echo 52 flanger 49 importing 59 noise gate 57 phaser 48 VST 59 Equalizer 53, 54 Expander 44 Export 95 projects 29 to CyberLink Cloud 29 Gate 44 F Fades 34 Feedback delays 46 echo 53 flanger 50 phaser 49 H Harmonic slope 80 Harmonics 80 Help 112 Hiss removal 81 Hold time 57 Hotkeys 107 Hum removal 78 I Import audio
CyberLink Audio Directo r L N Language changing 103 Levels 17 Library 6 Limiter 43 Loopback recording 27 New features 1 Noise inserting 39 reducing 74 Noise gate 57 Noise level threshold 81 Normalize across tracks 89 audio channels 32 volume on CD 101 M Markers timeline 12 Master track 85 Master volume 41 Media editing 31 importing 23 playback controls 15 Meter 17 Microphone 27 Mix 83 audio 5 master track 85 timeline 7 Mix down 95 Mixer panel 86 Modulation rate chorus effect 51 flanger 50 phaser 49 Mon
Index Produce 95 audio 95 video 97 Projects 29 CyberLink Cloud 30 exporting 29 Q Quick bar 13 R Radio 55 Range selection 9 Record 26 loopback 27 settings 27 what you hear 27 Release time 57 Restore 61 Reverb 47 Reverse 40 Room size 47 Room width 47 S Sample rate 31 Save projects 29 Shape 50 Share 99 Silence 39 Slider 7 Smart repeat 91 Smart transition 90 Sound clips CyberLink Cloud 25 DirectorZone 24 library 26 Sparkle 47 Spectral frequency view 11 Speed 37 Split 83 Spread 46 Stage count 48 Stereo 8 Su
CyberLink Audio Directo r Timeline overview 6 slider 7 Tracks adding 85 normalizing 89 Transitions 90 Trash 46 Trim 36 range 9 TrueTheater surround 31 U UI language 103 V Videos editing audio 31 importing 23 only audio 85 only video 85 playback controls 15 producing 97 Views spectral frequency 11 waveform 10 Visual repair 61 Vocals changing 53 pitch 54 removing 58 transforming 53 120 Voices count 51 Volume 21 master 41 normalizing 101 VST effects 59 W Waveform view 10 Web support 112 What you hear 27