
Operation Manual


75
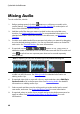
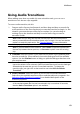
Restoring Audio
Using Click Removal
Use the Click Removal feature if your audio clips contain unwanted clicking or
related sounds in them.
To use the Click Removal on audio, do this:
1. Select the media file in the library that you want to repair.
2. If required, use range selection to select the portion of an audio file you want
to repair. See Range Selection for more information on selecting a range of an
audio file. If you don't select a range, the entire audio clip is repaired.
Note: the entire audio file's waveform is selected by default when this feature is
opened. If you want to apply this feature to the entire audio file, you do not need to
use range selection when the entire waveform is selected.
3. Decide whether you want to repair all the available channels, or just one
channel. See Selecting Channels for Editing for more information on selecting
channels.
4. Click Click Removal to open the Click Removal window.
5. If required, select a preset from the Presets drop down. These
presets can auto repair your audio for you.
6. Use the Sensitivity slider to adjust the amount of Click Removal
applied to the selected audio clip.
7. If required, you can preview the repaired audio by selecting Restored
result and then clicking the play button. Select Original audio if you
want to play the original audio.
8. Click Apply to repair the audio.
Using Hum Removal
The Hum Removal feature removes hum noise and its harmonics from audio clips.
Hum noise is usually caused by electronics (faulty microphone, electrical
interference with recording device, etc.) during the original recording.
To use Hum Removal on audio, do this:
1. Select the media file in the library that you want to repair.
2. If required, use range selection to select the portion of an audio file you want
to repair. See Range Selection for more information on selecting a range of an