
Operation Manual


47
Editing Audio
selecting channels.
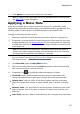
4. Click Phone under the Apply Effect section.
5. Select the Phone type from the drop down. Each type provides a slightly
different effect to your audio.
6. If required, you can preview how the applied effect will sound by
selecting Adjusted result and then clicking the play button on the
playback controls. Select Original audio if you want to play the
original audio.
7. Click Apply to apply the phone effect to the audio.
Note: if required, click on the Effect tab to see the applied effect in the edit panel.
See Effect Tab for more information.
Adding Delays
Use the Delay effect to add analog and tape-style echoes to your tracks. This
vintage gear-inspired delay unit has unique features, including a delay meter that
lets you see and adjust the level and spacing of each echo generated.
To add a delay to audio, do this:
1. Select the media file in the library that you want to add the delay to.
2. If required, use range selection to select the portion of an audio file you want
to apply the effect to. See Range Selection for more information on selecting
a range of an audio file. If you don't select a range, the effect is applied to the
entire audio clip.
Note: the entire audio file's waveform is selected by default when this feature is
opened. If you want to apply this feature to the entire audio file, you do not need to
use range selection when the entire waveform is selected.
3. Decide whether you want to apply the effect on all the available channels, or
just one channel. See Selecting Channels for Editing for more information on
selecting channels.
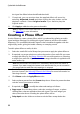
4. Click Delay under the Apply Effect section.
5. Select a delay preset from the Presets drop-down. Select the preset that best
suits the sound you want to achieve.
6. If required, click to modify the advanced settings as follows:
Select the delay mode you want to use: