
Operation Manual


40
CyberLink AudioDirector
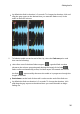
Normal: common white noise, or static, which can be quite loud to the
listener.
Pink: static like noise that sounds softer and quieter than normal white noise.
Brown: a lower frequency static like noise, which is quite quiet compared to
the others.
6. Enter the duration, in seconds, of the noise to be inserted in the field
provided.
7. Click Apply to insert the noise.
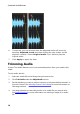
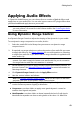
Reversing Audio
Use the Reverse feature to make a selected audio clip play in reverse.
To reverse audio, do this:
1. Select the media file in the library that you want to reverse.
2. Click Reverse under the Adjust Audio section.
3. Decide whether you want to perform reverse the audio on all the available
channels, or just one channel. See Selecting Channels for Editing for more
information on selecting channels.
4. If required, use range selection to select the portion of an audio file you want
to reverse. If you don't select a range, the adjustment is applied to the entire
audio file. See Range Selection for more information on selecting a range of
an audio file.
Note: the entire audio file's waveform is selected by default when this feature is
opened. If you want to apply this feature to the entire audio file, you do not need to
use range selection when the entire waveform is selected.
5. If required, you can preview how the reversed audio will sound by
selecting Adjusted result and then clicking the play button on the
playback controls. Select Original audio if you want to play the
original audio.
6. Click Apply to reverse the audio in the selected clip.
Adjusting the Master Volume
CyberLink AudioDirector lets you adjust the volume of an audio file at any point in
the timeline. You can make it louder at a certain moment, and then quieter at