
Specifications


RingCentral Office 13 To contact RingCentral, please visit www.ringcentral.com or call 1-800-574-5290.
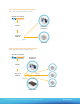
Paging Amplifier
Connect the amplifier to your network using a PoE-enabled Ethernet network cable and plug it into your voice or
main network. Use the Spkr Out output to connect a small number of small-sized speakers directly to the device,
or use the Line-Out output to connect a larger number through an amplifier.
With at least one speaker connected, use a paperclip or similar object to press and hold the RTFM button on the
front of the amplifier.
Note: The speaker will read aloud the IP address of the device; you may need to adjust the volume in order to hear
it. If it does not, make sure it’s properly plugged in and connected to a DHCP network using a PoE-enabled switch
and cable.
Open a web browser using a computer connected to the same network and go to the address that was 1.
read aloud by the speaker.
Enter the password when prompted. The default username and password are both admin (you can 2.
change the password on the initial screen).
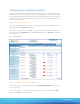
There are tabs on the left for the various device configuration options:
Device Config – Edit various amplifier options, most are self-explanatory. Please see the CyberData manal for
more information. Leave these settings at the default value for basic operation.
Networking – Control how the device connects to the network. Most users can leave this value as defaulted
for DHCP.
Sip Config – Determines how the amplifier connects to a SIP account.
If you are using this amplifier as a unit with the paging server, you must:
Uncheck the 1. Enable SIP operation box and press Save at the bottom.
Click 2. Reboot.
If you plan to use this amplifier as a standalone extension connected to your RingCentral account
without using a paging server, input your SIP account settings here.
Enter the value from your RC account labeled 1. SIP Domain in the SIP Server field,
but do not include :5060. It should read sip.ringcentral.com.
Enter 2. 5060 in the Remote SIP Port field.
Enter 3. 5060 In the Local SIP Port field.
Enter the value from your RingCentral account labeled 4. Outbound Proxy in the Outbound Proxy field,
but do not include :5060. It should read sip.ringcentral.com.
Enter 5. 5090 in the Outbound Proxy Port field.
Enter the value from your RingCentral account labeled 6. User Name in the SIP User ID field.
Enter the value from your RingCentral account labeled 7. Authorization ID in the field Authenticate ID.
Enter the value from your RingCentral account labeled 8. Password in the field Authenticate Password.
Make sure that the box 9. Register with a SIP Server box is checked.
Leave all other settings at their default values.10.
Select 11. Save.
Select 12. Reboot.
Your configuration is complete once you reboot your amplifier. You can now dial it using the extension or direct-dial
number. The amplifier should answer, and you can make announcements over the speaker.