
Product Manual


PAGE 5
•
51170-INS-RB
•
800.798.0813
•
NEED ASSISTANCE?
•
CURTMFG.COM
MOUNTING THE LED DISPLAY ROTARY KNOB
Install the LED display rotary knob before installing the main module.
There are two options for mounting the LED display knob in the vehicle.
Notes: Do not insert terminals into the plug connector at this time.
When inserting the LED display rotary knob into the base plate,
ensure the top of the LED arc is facing the upright direction.
Base plate installation, drill mount option
1. Determine a suitable mounting location for the LED display knob.
a. The LED display must be mounted securely to a solid surface.
b. The LED display must be easily reached by the driver.
c. The area behind the mounting location must
be clear to avoid damage while drilling.
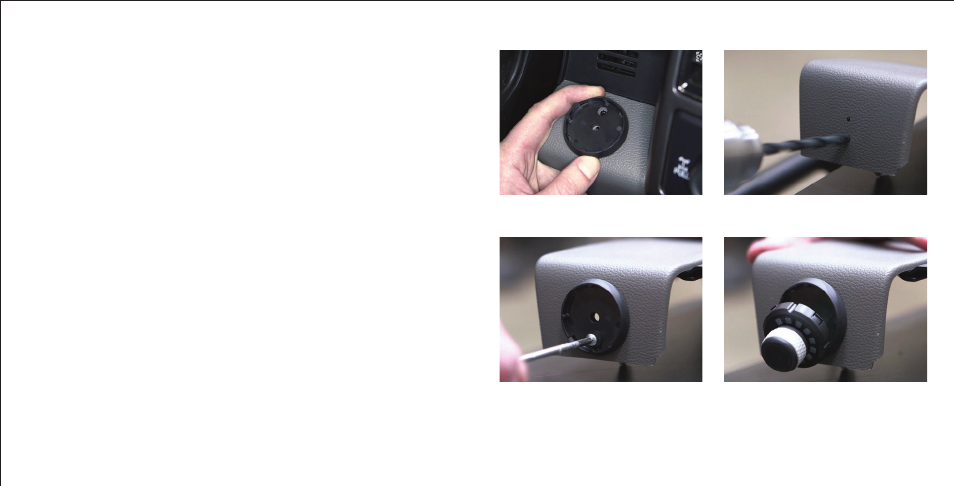
2. Hold the base plate in the selected position and mark
the two hole locations through the base plate (Fig 1).
3. Using a 5/16" drill bit, drill the holes at the marked locations (Fig 2).
Note: Fig 2 - 4 show the base plate upside down due to dash panel
removal for ease of installation. Removal is not required for installation.
4. Insert the provided well-nut and screw into the outer hole of the base
plate to secure the base plate to the dash panel (Fig 3).
5. Feed the cable of the LED display knob through the center hole. Insert
the LED display rotary knob into the base plate with the LEDs in the
upright position. Press down until you hear a 'click' (Fig 4).
6. Route the cable behind the dash from the LED display knob
to the main module. See the 'Main Module' section (page 7).
Figure 2 (dash panel removed)
Figure 4 (dash panel removed)
Figure 1 (dash panel in truck)
Figure 3 (dash panel removed)