
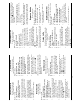
Specifications


98
feature that quickly cleans the steam wand.
Espresso is then immediately dispensed.
Tips for creating a perfect froth:
Milk frothing is the steaming of milk. The steam
does two things; it heats milk and it mixes in air
to form a foamy texture. As with anything,
perfecting the art of milk texturing takes
practice, but the results are well worth it!
Use cold, refrigerated milk in the milk tank.
Any type of milk may be used, but for best
results, skim is recommended.
Keep in mind that the milk volume will
increase during frothing, so use a large
enough mug.
NOTE: If the milk tank is not installed or
placed in the unit correctly, the STEAM ,
CAPPUCCINO and LATTE LEDs will not
light. Only lit LEDs are
active functions.
TEMPERATURE
CONTROLS
Hotter is the default setting. If Hot is
desired, press the
button and allow a few
seconds for the temperature to decrease.
The flashing light will turn steady when it has
reached temperature.
Energy Saver Mode
After 30 minutes of
non-use the espresso
machine will
automatically switch to
sleep mode and all the
control lights will be
dimmed by about 50%. When any button is
pressed, the espresso machine will return to
preheat mode and all the lights will flash.
The machine is ready to operate when all
the lights are steady again.
Auto-Off Mode
Following the 30-minute Energy Saver cycle,
if there is an additional 30 minutes of non-
use, the espresso machine will turn off.
Press the power button to turn on again.
CLEANING AND
MAINTENANCE
Cleaning External Parts
We recommend regular cleaning of the
espresso maker’s external components.
1. Never immerse the machine in water or
other liquids. The housing and external
parts may be cleaned with a soapy,
damp, non-abrasive cloth.
2. To remove the drip tray, simply slide it
toward you, keeping it level at all times
in order to prevent spills. The drip tray
and drip tray plate are dishwasher safe.
Do not clean drip tray with cleansers,
steel wool pads or other abrasive
materials.
Cleaning the Water Reservoir
It is normal over time for discoloration,
spotting or staining to appear in the water
reservoir. Results will vary depending on the
mineral content of the bottled or filtered
water used but will not affect the operation
of the machine. However, be sure to clean
the water reservoir regularly to minimize
build up.
Clean inside the water reservoir with a damp,
lint-free cloth as necessary.
Cleaning the Milk Tank
Disassemble the steam wand, dial and
tubing, and clean in the sink or dishwasher
(top rack only).
Decalcification
Mineral content in water varies from place to
place. Depending on the mineral content of
the water in your area, calcium deposits or
scale may build up in your machine. Though
scale is non-toxic, it can hinder performance.
De-scaling the machine will help maintain
the heating element and other parts that
come in contact with water.
For optimal performance, de-scale your
machine every 3 to 6 months. It is possible
for calcium to build up faster, making it
necessary to de-scale more often.
To begin, you will need the following:
r PVODFTNMPGEJTUJMMFEXIJUF
vinegar
r PVODFNMDFSBNJDNVHEPOPU
use paper cup)
Step 1: First Vinegar Rinse
r 'JMMXBUFSSFTFSWPJSXJUIPVODFT
(285 ml) of undiluted white vinegar.
r 1MBDFUIFDFSBNJDNVHPOUIFESJQUSBZ
r -JGUUIFCSFXIFBEIBOEMFCVUEP/05
add a capsule.
r $MPTFUIFCSFXIFBEBOEQSFTTUIF
MANUAL button.
r XJMMJMMVNJOBUFCMVFXIJMFUIFWJOFHBS
is dispensing. Press again to stop it
once the mug is halfway full.
r -&%TXJMMTUBSUGMBTIJOHUPTJHOBMUPGJMMUIF
reservoir.
r "MMPXUIFNBDIJOFUPTJUGPSNJOVUFT
r 1PXFSPOUIFNBDIJOFPQFOBOEDMPTF
the brew head, then press to start
dispensing. Press again to stop
dispensing.
r %JTDBSEUIFDPOUFOUTPGUIFNVHJOUP
the sink.
Step 2: Fresh Water Rinse
r 3FQFBUTUFQUISFFUJNFTVTJOHGSFTI
water in place of vinegar.
r
This will clean the machine’s plumbing
and remove any residual vinegar taste.
The machine is now ready for normal use.
Maintenance: Any other servicing should be
performed by an authorized service
representative.
TROUBLESHOOTING
Problem: Machine does not have power.
Solution:
r 1MVHUIFNBDIJOFJOUPBOJOEFQFOEFOU
outlet.
r .BLFTVSFUIFNBDIJOFJTTFDVSFMZ
plugged in.
r 3FTFUZPVSIPNFTDJSDVJUCSFBLFS
r $POGJSNUIFQPXFSIBTCFFOUVSOFEPO
and the controls are illuminated.
Problem: Machine will not brew.
Solution:
r 5VSOPGGBOEVOQMVHUIFNBDIJOFGPS
seconds or more. When you plug the
machine back in, be sure to turn the
power back on.
r .BLFTVSFUIFSFJTXBUFSJOUIFSFTFSWPJS
r .BLFTVSFUIFSFTFSWPJSJTQSPQFSMZ
installed.
r .BLFTVSFCSFXIFBEJTDPNQMFUFMZ
closed.
Problem:
Chlorine or mineral taste in
coffee.
Solution:
r $POTJEFSVTJOHCPUUMFEPSGJMUFSFEXBUFS
Problem: Doesn’t brew a full cup.
Solution:
r 5VSOPGGBOEVOQMVHUIFNBDIJOFGPS
seconds or more. When you plug the
machine back in, be sure to turn the
power back on.
r %FDBMDJGZUIFNBDIJOFSFGFSUPQBHF
Problem: The used capsule will not fall
into the capsule container.
Solution:
r 5IBUJOEJDBUFTUIFDBQTVMFDPOUBJOFSJT
full. Empty the capsule container and
then try again, or manually remove the
used capsule in the brew head.
Problem: I want to reset the coffee
programming.
Solution:
r 4FFQBHFTBOEGPSJOTUSVDUJPOT