
Specifications


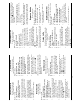


76
PREPARING YOUR
ESPRESSO MACHINE
1.
Place the espresso machine on a dry, stable
countertop or other flat, sturdy surface
where you will be using the machine.
IMPORTANT: For first-time use or if the
machine has not been used for some time,
it is important that it is rinsed as follows:
2. Remove the lid of the water reservoir.
Using the handle, lift the water reservoir off
the base and fill with fresh, cold drinking
water. Replace the water reservoir on the
base, and cover with the lid. Using the
tracks as a guide, slide the water reservoir
back into position and push down firmly
to engage.
Important: The unit will not function unless
the water reservoir is properly in place.
3. Insert the plug into a power outlet. Press
the power button once to turn the espresso
machine on. All of the controls on the front
of the machine will flash while it’s pre-
heating. Lights will turn steady when the
unit is in ready mode (approximately
1 minute).
4. Make sure the drip tray and grate are in
place.
5. Place a mug on the drip tray.
6. Press the Manual button and allow the
water to run through for approximately 5 to
10 seconds. Press once more to stop.
7. Place espresso cups on the warming plate.
8. The machine is now in preheat/ready mode
and ready to use.
NOTE: If the water reservoir is empty or not
properly positioned, the unit will not function. The
Short , Long , Manual , and Steam
LEDs will flash. Turn off the machine, fill the water
reservoir, and turn the machine back on.
USING YOUR
ESPRESSO MACHINE
Always make sure you have water in the
reservoir, a capsule in the brew head, and
that the appropriate tray is being used.
NOTE: This machine is designed
exclusively for use with illy’s iperEspresso
capsules. Any other type of capsule, pod,
or coffee cannot be used.
Short or Long Pre-Programmed Espresso
1. Using the lever, open the brew head, insert
a capsule, and close the brew head.
2. With an espresso cup on the espresso cup
tray, select either a SHORT
[1.2 ounces
(35ml)] or LONG
[3 ounces (88ml)]
espresso. (The selected function and Hotter
temperature setting LEDs remain on, while
all the other LEDs are off. Once all LEDs
are on again, the machine is ready for the
next cycle.)
For optimal results, we recommend using the
long
button with the blue "Lungo"
iperEspresso capsule. Using this setting with
other iperEspresso varieties will alter the taste.
NOTE: As part of illy patented technology in the
iperEspresso capsule, the brewing process is
completely self-contained in the capsule and
does not get into the brew head. So there is no
need to rinse in between cycles as there will be
no transfer of flavour.
CAUTION: Scalding may occur if the brewing
head is opened during brewing cycle.
Manual/Adjustable Strength Control
Programming
1. Using the lever, open the brew head, insert
a capsule, and close the brew head.
2.
For adjustable strength control, use the
MANUAL
button to adjust the length of
time espresso is dispensing – the longer
you allow it to flow, the lighter it will be.
Press to start
dispensing. When your
cup is filled to desired
level, press
again to
stop.
PROGRAMMING A
CUSTOM SETTING
At ready mode, press and hold
MANUAL
for 3 seconds to
customize the SHORT
and LONG
output.
1.
, , are ON. If no
action within 30 seconds,
unit returns to preheat/
ready mode.
2. Press
or button.
a.
or and LED remains on.
b. Espresso is dispensed.
c. When desired amount is dispensed into
cup, press
or again. That will be
the programmed amount.
d. If no action during dispensing within
90 seconds, unit returns to preheat/
ready mode.
To reset to factory setting at
ready mode, press and hold
and at the same time
for 3 seconds.
1. ,and and LEDS flash 3 times.
2. Default setting is on and unit will return to
preheat/ready mode.
STEAM
1. Remove the
milk tank by
holding the
milk tank and cover, and pull away from the
machine. Remove the cover and pour milk
into the tank, above min. fill line [5 ounces
(148 ml)] but not exceeding the max. fill line
[22 ounces (650 ml)]
. Replace the cover and
align the milk tank to the connector on the
side of the machine, and push in to install.
Place a mug on the drip tray and position the
steam wand into the mug. Adjust the length
of the stainless steel cover on the wand so it
is the proper length for your mug. Press the
STEAM
button to start steaming, and use
the steam control dial to control the air/foam.
Press
again to stop steaming.
NOTE: Turning the steam control dial to the
right lessens the amount of air/foam.
2.
To steam using water (as a cleaning function),
make sure water is in the milk tank. Press to
start and stop steaming.
3. To remove the steam wand, position it pointing
straight down, then rotate counter clock wise
and pull straight out.
CAPPUCCINO or LATTE
1. Using the lever, open the brew head, insert a
capsule, and close the brew head.
2. Be sure there is milk in the milk tank and tank is
properly installed (see steam section).
3. Place a mug on the drip tray,
and position the steam wand
in the mug.
4. Use the steam control dial to
select the amount of air/froth
you want.
NOTE: It is recommended to
use more steam
for a
cappuccino and less steam
for a latte.
5. Press either the Cappuccino or Latte
button. The amount of foam
will vary, but a cappuccino
requires more foam than a
latte, while the latte will use
more milk.
6.
The foamed milk will be
dispensed into the mug,
followed by Cuisinart’s
patented Burst of Steam