
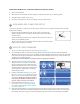
Operation Manual

NOTE: Your Cube will have printed test creations before leaving the factory. These test creations may have been
printed in a different material color than you are using. Therefore, a small amount of material may be remaining in
the Print Jet. The start of your rst creation may have some of this material color until it transitions over to your
material color.
WARNING: PRINT JET NOZZLE TIP BECOMES EXTREMELY HOT DURING SET-UP AND OPERATION. DO
NOT TOUCH NOZZLE.
Do not change color of material or cartridge during printing; doing so may damage the Cube.
To get started printing your rst creation; the creation les that were downloaded when you activated your account or a
.stl le will need to be converted to a .Cube le. This is the machine code le that the Cube printer will read to build your
creation.
WI-FI CONNECTION
if you wished to connect to WI-FI via Ad hoc or WLAN connection, please refer to Section 14: WI-FI Set-Up and follow the
step by step instructions. Then resume these instructions and follow the steps below to connect to your Cube. These steps
apply to both Ad Hoc and WLAN connections.
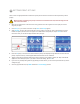
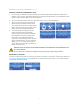
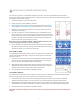
1. Open Cube Software and click on Congure. Click on your Cube model in the dialog box and click on Connect. Your
computer is now connected to your Cube.
2. Click on Import and select a le from the creation les that you downloaded from Cubify.com or a .stl le. The creation
that you selected will appear on Print Pad. The software’s Print Pad is a simulation of your Cube Print Pad.
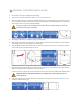
3. In the software you can orient, scale, and manipulate your creation to ensure that you obtain the optimum printing
results. Refer to Section 13: Cubify Software Overview to understand the different functions your software provides.
4. To prepare your creation le for printing, click on Build and save your creation as a .cube le.
PRINTING WITH WI-FI CONNECTION
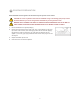
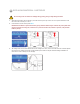
1. If have a WI-FI connection, click on Print and select the Cube le saved from your creation le; click on Open to send
your le to the Cube.
2. On the Cube touchscreen, nger tap check box to start the build le or tap the X box to cancel.
3. The Cube will begin the heating process; this will take a few minutes. During the heating process, the print tip and
the Print Pad will reach the temperatures that have been preset by the manufacturer. Once these temperatures are
reached, your creation will begin to print.
NOTE: During printing operation, please do not place a cover over your Cube. The Cube generates heat during
printing and if covered, it can cause damage to the Cube.
!
24
19 PRINTING YOUR FIRST CREATION