
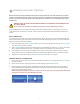
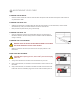
Operation Manual

There must be an appropriate distance between the print tip and the Print Pad to make sure the rst printed layer sticks
properly.
When the Cube is operating, the print tip on the Print Jet nozzle becomes hot; avoid touching this area
until it has cooled down.
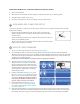
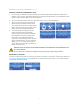
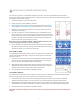
1. Make sure the textured side of the Print Pad is facing upwards. Place the magnetic side of the print pad onto the
magnetic print plate.
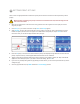
2. Press Set Up on your Cube’s touchscreen and tap Next until Set Gap appears.
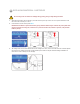
3. Select Set Gap. The Print Jet and Print Pad will move into position to set the gap. Place a standard piece of paper
between the print tip and Print Pad. If the paper cannot slide between the tip and pad, tap the down arrow on the
touchscreen until you can slide the paper between the tip and pad.
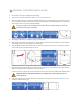
4. Press the Z up key to move the Print Pad toward the print tip until the paper is tight between the Print Pad and
print tip. Tap the down key until the paper slides back and forth with no resistance.
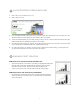
5. Tap the check mark to save this setting to the printer’s memory. If the setting is saved, the “Gap” value will be
applied for each subsequent print. If you wish to cancel this setting, tap the X box.
6. If you have any trouble printing after the gap setting has been saved, you can use this procedure at any time to
change the gap.
7. Once the gap has been set, tap PREV to start the Load Cartridge process.
!
21
16 SETTING PRINT JET GAP