
Operation Manual
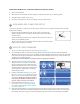

If you are not connected to a network, you can download your creations from your computer and save them to your USB
Memory Stick for printing.
• When printing with the USB Memory Stick, the le must be in the main folder
located on the memory stick. If it is put into another folder it cannot be accessed
from Cube screen.
• Install your USB Memory Stick into your computer’s USB connection and save your
creation to your USB Memory Stick.
• When you are ready to print your creation, install your memory stick into the Cube’s
USB connection and print your creations.
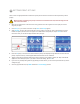
1. Tap on Setup on the Cube touch screen and scroll to Update Firmware.
2. If your USB Memory Stick is connected to the Cube, please remove the memory stick, (the screen will display the
directions to do this). Tap the NEXT arrow on the display; locate the USB cable and connect the cable to the Cube USB
port located on the back of the Cube (again, these instructions will be displayed on the screen). Connect the other end
of cable to your computer’s USB port.
NOTE: Never leave the USB cable connected except when upgrading the rmware.
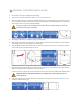
3. Tap the NEXT arrow. SETTINGS SAVED will be
displayed at the top of the screen. You will have 6
seconds to press and hold the control button until
rmware loader appears on the screen. If the button
is released before the rmware screen appears, the
screen will go blank. Repeat Step 1 to restart the
update rmware process.
4. Continue to hold button until Settings Saved and
then Cube Firmware Loader appears on the touch
screen. You are now in the correct mode to update
your rmware. NOTE: Even though the update is
unsuccessful, WLAN WI-FI should still work, To
try again, simply reconnect to the network,
5. Open Cubify Software and click the Congure
icon; click on Load New Cube Firmware. Once
you see the pop-up message Firmware Updated
Successfully, click OK.
6. Disconnect the USB cable from your Cube and computer; unplug the Cube power cord. Plug power cord back in and
press the Cube power button; a message will display on the touchscreen “Setting restored,” click on the check mark to
save settings. This does not change your previous settings that you have made. Your new rmware is now installed.
20
14
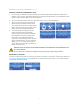
NON-WIRELESS COMPUTER SETUP
15 UPDATE CUBE FIRMWARE
SWITCHING FROM AD-HOC TO WLAN CONNECTION (OR VICE VERSA)
1. Close out Cube Software.
2. Disconnect the Cube’s wireless connection through the Internet Access menu on your operating system.
3. Now follow steps for WLAN / ad-hoc set up.
4. Re-open your software after your Cube successfully connects to WLAN / ad-hoc.