Cube 3D Printer ® 2nd generation User Guide See inside for use and safety information.
Table of Contents Introduction . . . . . . . . . . . . . . . . . . . . . . . . . . . . . . . . . . . . . . . . . . . . . . . . . . . . . . . . . . . . . . . . . . . . . . . . . . . . . . . . . . . . . . . . 2 Important safety information EN . . . . . . . . . . . . . . . . . . . . . . . . . . . . . . . . . . . . . . . . . . . . . . . . . . . . . . . . . . . . .
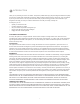
1 INTRODUCTION Thank you for purchasing the “Cube®” 3D Printer. This printer is portable with a plug and print design that enables everybody in the family to express their creativity like never before. With ten different material colors to choose from, enjoy the freedom to print in your true colors or to mix it up.Cube 3D Printers ready-to-print technology provides a new dimension to your imagination and helps you share your creations with others in the Cubify community at Cubify.com. At Cubify.
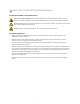
2 IMPORTANT SAFETY INFORMATION (EN) SAFETY SYMBOLS AND DEFINITIONS Hot Surface Hazard: A hot surface is accessible in the vicinity of this sign or at the Print Jet; avoid contact. Hot surfaces can cause severe burns. ! Caution: Indicates something may happen that could cause loss of data, damage to equipment, or could cause personal injury. Caution: Indicates a pinch point hazard that could cause person injury.
2A WICHTIGE SICHERHEITSINFORMATIONEN (DE) SICHERHEITSSYMBOLE UND DEFINITIONEN Gefahr durch heiße Oberflächen: Eine heiße Oberfläche ist in der Nähe dieses Zeichens oder am Print Jet zugänglich; vermeiden Sie jeglichen Kontakt. Heiße Oberflächen können schwere Verbrennungen verursachen. ! Achtung: Weist darauf hin, dass etwas passieren kann, was zum Verlust von Daten, zu Schäden an den Geräten oder zu Körperverletzungen führen könnte.
2B INFORMACIÓN IMPORTANTE SOBRE SEGURIDAD (ES) SÍMBOLOS Y DEFINICIONES DE SEGURIDAD Peligro de superficie caliente: Una superficie caliente se encuentra cerca de esta señal o en la impresora; evite el contacto con esta. Las superficies calientes pueden causar quemaduras graves. ! Precaución: Indica que algo puede ocurrir y causar una pérdida de datos, daños al equipo o lesiones. Precaución: Indica un peligro de punto de pellizco que podría causar lesiones a una persona.
2C INFORMATIONS IMPORTANTES RELATIVES À LA SÉCURITÉ (FR) SYMBOLES DE SÉCURITÉ ET DÉFINITIONS Surface chaude: Une surface chaude est présente à proximité de ce symbole ou sur l’imprimante ; évitez de la toucher. Les surfaces chaudes peuvent causer de graves brûlures. ! Attention: Indique que quelque chose pourrait occasionner une perte des données, des dommages sur l’équipement ou des blessures. Attention: Indique un risque de pincement qui pourrait occasionner une blessure.
2D INFORMAZIONI IMPORTANTI SULLA SICUREZZA (IT) SIMBOLI E DEFINIZIONI DI SICUREZZA Pericolo di superficie calda: In prossimità di questo simbolo o del getto d’inchiostro è presente una superficie calda; evitare il contatto. Le superfici calde possono causare ustioni gravi. ! Attenzione: Segnala che un determinato evento potrebbe causare la perdita di dati, danni all’impianto o lesioni personali. Attenzione: Segnala la presenza di una zona ad alto rischio che potrebbe causare lesioni personali.
2E BELANGRIJKE VEILIGHEIDSINFORMATIE (DU) VEILIGHEIDSSYMBOLEN EN DEFINITIES Gevaar voor hete oppervlakken: Er is een toegankelijk heet oppervlak in de nabijheid van dit waarschuwingsteken of bij de Print Jet. Niet aanraken. Hete oppervlakken kunnen ernstige brandwonden veroorzaken. ! Let op: Duidt op iets wat kan gebeuren dat verlies van gegevens, beschadiging van de apparatuur of lichamelijk letsel kan veroorzaken. Let op: Duidt op een gevaarlijk knelpunt dat lichamelijk letsel kan veroorzaken.
2F VIGTIG SIKKERHEDSINFORMATION (DA) SIKKERHEDSSYMBOLER OG -DEFINITIONER Fare for varm overflade: Der findes en varm overflade i nærheden af dette skilt eller ved printaggregatet; undgå kontakt. Varme overflader kan forårsage alvorlige forbrændinger. ! Forsigtig: Viser at der kunne ske noget som kan resultere i datatab, beskadigelse af udstyr eller personskade. Forsigtig: Viser at der findes en knusefare, som kan forårsage personskade.
2G 安全に関する重要情報 (JP) 安全関連シンボルと定義 高熱面の危険: このシンボルサインの近くまたはプリントジェット部には表面が高熱となっている部分がありま す。触れないように注意してください。高熱面で火傷することになります。 ! 要注意: データの喪失、機器の損傷、または人身傷害を引き起こすような何かが起こる場合もあることを示しま す。 要注意: 人身傷害を引き起こす可能性のある危険個所を示します。 SIK 安全ガイドライン • 本項の安全ルールのすべてに従い、また本書のすべての要注意および警告事項を守ってください。 • 安全機能を修正したり、Cube に改変を加えたりしないでください。そうすることは禁じられており、保証は無効にな ります。 • 純正 3D Systems コンポーネント以外のプリント材料や 3D プリントの使用は、保証を無効にする場合があります。 • 大人の監視が必要です。子供が使用している時には身近で見守り、安全上の問題を未然に防ぎ、Cube が適切に使用さ れるよう、必要に応じて介入するようにしてください。小型の 3D プリントが幼児の手に届くことのないよう
3 CUBE 3D PRINTER FEATURES The Print Jet print tip heats the material and produces a thin flowing material of plastic creating layers that adhere to the Print Pad. After each layer is produced, the Print Pad lowers so that a new layer can be drawn on top of the last. This process continues until the last layer on the top of the creation is jetted.
4 AT A GLANCE A Cube Tube A B B Print Jet C Print Pad D Operator’s Touchscreen E ON/OFF Push-Button Power Switch & Menu Function F Material Cartridge G Fuse C F H Power Cord Connection I USB Port* J USB Connection** D *For firmware update only. **For loading Cube build files only.
5 REQUIREMENTS FOR YOUR CUBE WEIGHT & DIMENSIONS WIRELESS OPTIONS • • Weight (without cartridge): 4.3 kg (9.5 lbs.) SOFTWARE • 802.11b/g with: WLAN Infrastructure or Ad hoc Mode. NON-WIRELESS OPTION Complimentary software for Windows and Mac OSX. This application converts your 3D model into layered slices (G-code), ready for printing on your machine.
6 UNPACKING AND SETTING UP YOUR CUBE Material Cartridge* Print Pad CubeStick™ Cube Tube Power Supply Power Cord USB Cable** Unclog Tool*** USB Stick ify.c cub om The Cube Quick Start Guide *Neon green included **For downloading firmware ***For unclogging filament in Print Jet SETTING UP YOUR CUBE 1. Remove the white plastic inserts from each side of the box by pinching the tabs in and bending the inserts out. Pull to remove both from the box. Lift top of carton up and remove. 2.
7 LINK YOUR CUBE TO YOUR CUBIFY ACCOUNT Creating an account on Cubify.com is easy and gives you access to all of the great designs and collections that will drive and inspire your creativity. Once you have set up an account you will be able to activate your Cube by entering your Cube’s individual serial number in the designated bar under the Activate My Cube tab. An activation code will then be sent to the email account you used to register.
8 UNLOCK YOUR CUBE Once you’ve linked your Cube to your Cubify account, you can activate your Cube to start printing! 1. Your activation code to unlock your Cube will appear on the “Congratulations” screen after you activate your Cube in your Cubify account. A copy of the code should also be sent to your email. 2. Make sure your Cube is plugged in. Press the button on the front panel to turn it on. It may take a few seconds for it to warm up. 3. Tap on the touchscreen to view the Unlock Cube screen.
10 DOWNLOAD AND INSTALL CUBE SOFTWARE FOR MAC OSX Download the Cube Software and experiment with it to create your own designs. 1. In the menu, Click on Download Cube Software. Double click on the zip file and the Cubify Mac installer.dmg will appear. 2. Double click Cubify Mac Installer dmg, to make a new window open. Drag to install into the Applications folder. 3. If the “Drag to install” window did not open, locate the Cubify driver in your device panel. Click on Cubify to download software.
12 CUBIFY SOFTWARE OVERVIEW Cubify Software allows you manipulate your design before sending it to the Cube for printing. It simulates the Cube’s Print Pad so you can orient, scale, re-size and rotate the 3D print to get the best result when printing. Become familiar with the software and understand the functions before starting your first print. IMPORT HEAL ORIENT & SCALE Select your creation file. Fix your creation.
13 WI-FI SETUP SET UP A COMPUTER (AD HOC) NETWORK An ad hoc network is a temporary connection to your Cube through your computer or wireless smart phone. Ad hoc networks can only be wireless, so you must have a wireless network adapter installed in your computer to setup or join an ad hoc network. NOTE: Ad hoc will not connect to operating systems running Windows XP. 1. Tap on Setup in the main menu and scroll until you come to the WI-FI Setup screen. 2. Tap WI-FI Setup. 3.
SWITCHING FROM AD-HOC TO WLAN CONNECTION (OR VICE VERSA) 1. Close out Cube Software. 2. Disconnect the Cube’s wireless connection through the Internet Access menu on your operating system. 3. Now follow steps for WLAN / ad-hoc set up. 4. Re-open your software after your Cube successfully connects to WLAN / ad-hoc. 14 NON-WIRELESS COMPUTER SETUP If you are not connected to a network, you can download your creations from your computer and save them to your USB Memory Stick for printing.
16 SETTING PRINT JET GAP There must be an appropriate distance between the print tip and the Print Pad to make sure the first printed layer sticks properly. ! When the Cube is operating, the print tip on the Print Jet nozzle becomes hot; avoid touching this area until it has cooled down. 1. Make sure the textured side of the Print Pad is facing upwards. Place the magnetic side of the print pad onto the magnetic print plate. 2. Press Set Up on your Cube’s touchscreen and tap Next until Set Gap appears.
17 MATERIAL CARTRIDGE INSTALLATION 1. Use scissors to remove the cartridge from its packaging. 2. Tap Setup on your Cube’s touchscreen, select Load Cartridge, and press Next. 3. Remove the thumbscrew from the side of the Material Cartridge and remove the blue tape from the material. Save the screw to reinstall into cartridge if material was not fully used during printing. This will prevent filament from unravelling during storage. Press Next to begin cartridge installation.
18 PRINTING PREPARATION NOTE: CubeStick must be applied to the Print Pad every time you start a new creation. ! CAUTION: Do not use any adhesive other than the CubeStick. Doing so can damage your print tip and the Print Pad. Make sure you use the 2nd generation CubeStick for your 2nd generation Cube. ! WARNING: APPLY ADHESIVE JUST PRIOR TO STARTING A PRINT. ADHESIVE WILL DRY IF YOU WAIT TO START A PRINT AFTER APPLICATION. ADHESIVE SHOULD STILL BE WET AT START OF PRINT. 1.
19 PRINTING YOUR FIRST CREATION NOTE: Your Cube will have printed test creations before leaving the factory. These test creations may have been printed in a different material color than you are using. Therefore, a small amount of material may be remaining in the Print Jet. The start of your first creation may have some of this material color until it transitions over to your material color. ! WARNING: PRINT JET NOZZLE TIP BECOMES EXTREMELY HOT DURING SET-UP AND OPERATION. DO NOT TOUCH NOZZLE.
PRINTING YOUR FIRST CREATION (continued) PRINTING FROM THE USB MEMORY STICK 1. If you are using your USB Memory Stick to download your Cube file, please install the USB Memory Stick into the USB port on your computer. Open the file folder where your Cube file is located and save it on the USB Memory Stick. Remove memory stick and install it into the Cube’s USB port. 2. Tap Print on the touchscreen and use left or right arrows until you see your Cube file displayed. 3. Tap on your .
20 REPLACING MATERIAL CARTRIDGE ! Do not change color of material or cartridge during printing; doing so may damage the Cube. 1. After being instructed by the touchscreen, pull Cube Tube away from top of Print Jet. Do not pull the material out until the touch screen instructs you to do so. 2. Pull material out of Print Jet and press Next. NOTE: After the material is pulled out from the print jet, material debris may be visible at the print tip that could clog the tip.
21 CLOUD PRINTING FORM CUBIFY.COM 1. Click on My Cubify and select My Account. 2. Click on My Downloads. 3. If you would like to download a file to save on your computer or print using Cube software, click on DOWNLOAD. The file will download to the Cube software on your computer to save your creation. 4. Your file can download directly to your Cube by clicking on PRINT ON MY CUBE; the Select Cube Printer screen will appear and will search for available Cube printers on your network. 5.
23 MAINTAINING YOUR CUBE CLEANING THE EXTERIOR • Clean the Cube’s exterior with a lint free cloth and water. Dampen the cloth with water and wipe the outer surfaces of any debris that is visible. CLEANING THE PRINT PAD • Submerge the Print Pad in a container filled with warm tap water. Please do not use well water; it contains certain minerals that may make your creation difficult to remove from the Print Pad. • Rinse pad under tap water and dry using a lint free wipe.
24 PRINT PAD LEVELING INSTRUCTIONS Your Print Pad may become un-leveled when transporting your Cube. If this occurs, please follow these instructions to level your Print Pad for optimum creation experience. The Print Pad pad can be leveled with the two adjusting bolts located underneath the front and back of the pad. 1. Press the power button on the Cube control panel. 2. Ensure Print Pad is properly installed on print plate. 3.
3D Systems, Inc. 333 Three D Systems Circle | Rock Hill, SC | 29730 Cubify.com ©2013 3D Systems, Inc. All rights reserved. The 3D Systems logo, Cube and Cubify are registered trademarks of 3D Systems, Inc. pn 350341-01, Rev.