
User Manual
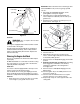
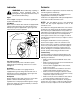
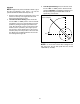

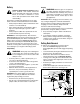
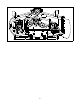
Table Of Contents
- SECTION 1: important safe operation practices
- SECTION 2: slope gauge
- SECTION 3: tractor set-up
- Gas and Oil Fill-up
- Setting the Gauge Wheels and Roller
- SECTION 4: know your lawn tractor
- Throttle Control Lever
- Choke Control
- Brake Pedal
- Seat Adjustment Lever
- Ignition Switch Module
- Drive Pedal
- Systems Indicator Monitor / Hour Meter
- Deck Lift Lever
- Electric PTO / Blade Engage Knob
- Cruise Control Lever
- Parking Brake Lever
- SECTION 5: operating your lawn tractor
- Safety Interlock Switches
- Reverse Caution Mode
- Starting the Engine
- Stopping the Engine
- Engaging the Parking Brake
- Driving The Tractor
- Driving On Slopes
- Setting The Cruise Control
- Using the Deck Lift Lever
- Operating the Headlights
- Moving The Tractor Manually
- Engaging the PTO
- Mowing
- SECTION 6: making adjustments
- Leveling the Deck
- Parking Brake Adjustment
- Seat Adjustment
- Steering Adjustment
- SECTION 7: maintaining your lawn tractor
- Engine
- Changing the Engine OIl
- Air Filter
- Cleaning the Engine And Deck
- Lubrication
- Carburetor
- SECTION 8: service
- Tires
- Fuse
- Cutting Blades
- Battery
- Cutting Deck Removal
- Changing the Deck Belt
- Changing The Transmission Drive Belt
- Hydrostatic Transmission
- SECTION 9: off-season storage
- Engine
- SECTION 10: maintenance chart
- SECTION 11: maintenance log
- SECTION 12: troubleshooting
- SECTION 13: attachments & accessories
- SECTION 14: Replacement Parts
- SECTION 15: specifications*
26
• Repeat the above steps on the tractor’s right side.
• Move the deck lift lever into the top notch to raise
the deck lift arms up and out of the way.
• Gently slide the cutting deck toward the front of the
tractor allowing the hooks on the deck to release
themselves from the deck stabilizer rod.
• Gently slide the cutting deck (from the right side)
out from underneath the tractor.
Changing the Deck Belt
WARNING: Be sure to shut the engine off,
remove ignition key, disconnect the spark
plug wire(s) and ground against the engine to
prevent unintended starting before removing
the belt(s).
WARNING: Avoid the possibility of a
pinching injury. Do not place your fingers on
the idler spring or between the belt and a
pulley while removing the belt.
All belts on your tractor are subject to wear and should
be replaced if any signs of wear are present.
IMPORTANT:
The V-belts found on your tractor are
specially designed to engage and disengage safely. A
substitute (non-OEM) V-belt can be dangerous by not
disengaging completely. For a proper working machine,
use factory approved belts.
To change or replace the deck belt on your tractor,
proceed as follows:
• Lower the deck by moving the deck lift lever into the
bottom notch on the right fender.
• Remove the belt guards by removing the self-
tapping screws that fasten them to the deck.
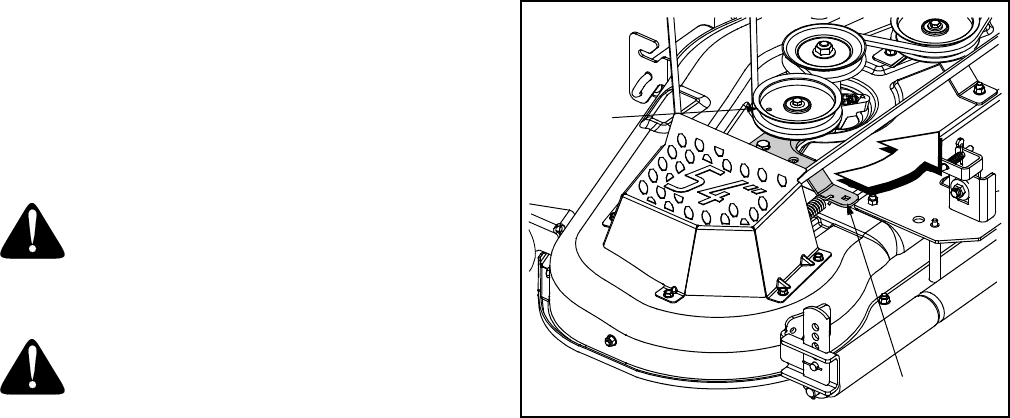
• Insert a 3/8”-drive ratchet wrench (set to loosen)
into the square hole found in the idler bracket on
the left side of the deck’s surface. See Figure 19.
Figure 19
• Grasp the ratchet’s handle and pivot it toward the
tractor’s right side to relieve tension on the belt.
• With belt tension relieved, carefully remove the
belt from around the left-hand spindle pulley.
IMPORTANT:
Carefully allow the ratchet to pivot
rearward before removing it from the square hole.
• Remove the deck belt from around all pulleys,
including the deck idler pulley(s) and the electric
PTO clutch.
NOTE: The idler pulley(s) may have to be loosened,
but not removed, in order to remove the belt from
around them.
• Route the new belts (deck belt first) as shown
below.
• Remount the belt guards removed earlier.
Changing The Transmission Drive Belt
NOTE: Several components must be removed and
special tools (i.e. air/impact wrench) used in order to
change the tractor’s transmission drive belt. See your
Cub Cadet dealer to have your drive belt replaced.
Hydrostatic Transmission
Keep the area around the transmission cooling fan free
of grass and debris at all times. The transmission is
sealed at the factory and is maintenance free. The fluid
level cannot be checked and cannot be changed.
3/8” Square Hole
Idler Pulley