
User`s guide


196 VEREX Director V4.73 User's Guide 21-0381E v4.7.3
Phase 2: Community
Groups
2A: Set Up Communities
With shared users, the 'PIN Mode'
and 'User L ogon Mode' for each
account is se t under "[Management]
ÖCommunity Groups", and will not be
editable under "Account Info rmation".
(This is requi red since the length of
each user's PIN and card number is fixed.)
These are defined as "Com munities" which will
be assigned in step 2B.
Note: If communities are assigned to accounts without
setting up shared users, this will block the same card
numbers from being used across all accounts for each
community (i.e., each card number can only apply to
one account for each specific community).
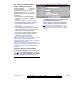
How to Get Here (Locator)
Select Community Gr oups from the MyTools
bar, or
select [Management] in the tree, and
Community Gr oups, follo wed by the
Communities tab
.
Things You Can Do
• To add a new community to the list, click the
[+] near the bottom of the screen (or right-
click the screen, and select "Add New" from
the pop-up menu.
• To delete an unused community, right-click it
in the list, and select "Delete".
Note: You cannot delete a community from the list if
it is presently being used (i.e., assigned to user-
groups).
• To enter or change settings for a community,
refer to the item-descriptions for this screen.
Note: 'Grid' view does not apply to this feature.
- Community Name: Click here and type a
suitable name (such as "4dPIN-5dCard
Accounts").
- PIN Mode: Click the small button here, and
select the PIN length (4 or 5 digits);
- User Logon Mode: Click the small button
here, and select the logon mode (ID-only, or
number of digits in the card numbers);
Note: PIN Mode and User Logon Mode pertain to
logging in at LCD keypads, or gaining entry at a
reader that is set for "ID+PIN mode.
2B: Reserve User ID#s
(Shared User-Groups)
"Shared User Groups" allow setting up sh ared
users in blocks based on common authorities,
plus the 'PIN Mode' and 'User Logon Mode' for
the accounts to be associated with these
users. This includes reserving ranges of user
ID#s for groups of shared users.
Tip: This is done in blocks of ten (whether they all will
be defined or not).
Note: For multiple groups of shared users to apply to
the same account
, ensure the ID ranges do not overlap.
How to Get Here (Locator)
Select Community Gr oups from the MyTools
bar, or
select [Management] in the tree, and
Community Gr oups, follow ed by the Users
tab
. Then, select your desired community near
the top of the screen.
Tip: This screen shows the "Shared User Groups" for
one community at a time. The selected "Community"
will be assigned by default, but you can change this if
desired.
[Management] ÖCommunity Groups
ÖCommunities