
User`s guide


Table Of Contents
- Copyrights and Trademarks
- Disclaimer
- Welcome to NetVision
- Common / Daily Tasks
- 5 Starting your Software and Logging In
- 6 Alarm / Reporting Features and 'Chatting'
- 7 Playing or Downloading Video Recordings
- 7.1 Overview--Types of Playback
- 7.2 Playback--Technical Details
- 7.3 Synchronized Playback (v2.3 SP2)
- 7.4 Video Search (v2.3 SP2)
- 7.5 Searching for Motion
- 7.6 Working with the Playback Screen
- 7.7 Viewing and Printing 'Snapshots'
- 7.8 Working with the File List
- 7.9 Quad Playback
- 7.10 Server Management--Identifying Remote Servers for Playback
- 8 Viewing Live Cameras
- 9 Recording Camera-Views
- System Administration and Maintenance
- 10 Tasks Applicable to Remote Stations and the Video Server
- 10.1 PC Date and Time
- 10.2 Checking your Software Version
- 10.3 Introduction to Video File Management (Filekeeping and Housekeeping)
- 10.4 To Allow Using a Blank CD (Roxio - Easy CD Creator 5 basic with DirectCD)
- 10.5 Filekeeping (v2.3 SP2)
- 10.6 Housekeeping
- 10.7 Automatic Video File Management (Self Housekeeping)
- 11 Tasks Performed at the Video Server Only
- 10 Tasks Applicable to Remote Stations and the Video Server
- System Configuration
- Software Installation and Network Set Up
- 19 PC Requirements
- 20 Software Installation or Upgrade
- 21 Network and Connectivity Issues
- 21.1 General Network Requirements
- 21.2 IP Addressing on the Network
- 21.3 Network Services
- 21.4 Network Ports
- 21.5 To Connect via the Internet
- 21.6 Remote User Permissions
- 21.7 For Remote Viewing, Recording, Playback, and/or Audio Monitoring
- 21.8 For Alarm Alerts
- 21.9 For E-Mail Alerts
- 21.10 Windows Dial-Up Networking Connection (i.e., not via the Internet)
- 21.11 Network Usage
- Reference Topics
- 22 Using the Small Remote Module
- 23 Remote Configuration
- 24 The WatchDog Feature
- 25 Hardware Reference
- 26 Troubleshooting
- 27 Using the ATM Interface Option
- 28 Working with the Older Playback Engines
- 28.1 The Video Playback Feature (Micro DVR)
- 28.2 Step 1: Open the Video Player
- 28.3 Step 2: Local / Remote, and Connection Screen
- 28.4 Step 3: Searching for Video/Alarm Files
- 28.5 Smart Motion Search (Micro DVR)
- 28.6 Step 4: Playing a Video
- 28.7 Window Options and File Properties (Micro DVR, Quad Player)
- 28.8 Viewing and Printing 'Snapshots' (Micro DVR)
- 29 Viewing Cameras through a Web Browser
- 30 Setting up an IP Camera or Video Server module (v2.3 SP2)
- 31 Panoramic Video Surveillance--PVS (v2.3 SP2)
21-0400E v2.3.3
Welcome Common Admin
Config
Install Tech-Ref
87
17.3
Resolution and Recording
Mode
You can select the quality for recordings, and
decide what the system will do when the hard
drive starts to get full.
Locator: (Logged in at the Video Server as
a "Supervisor"),
Select: [Utility], then [Option Setting].
Select Recording , and then make your
desired selections:
--------------------------------------------------
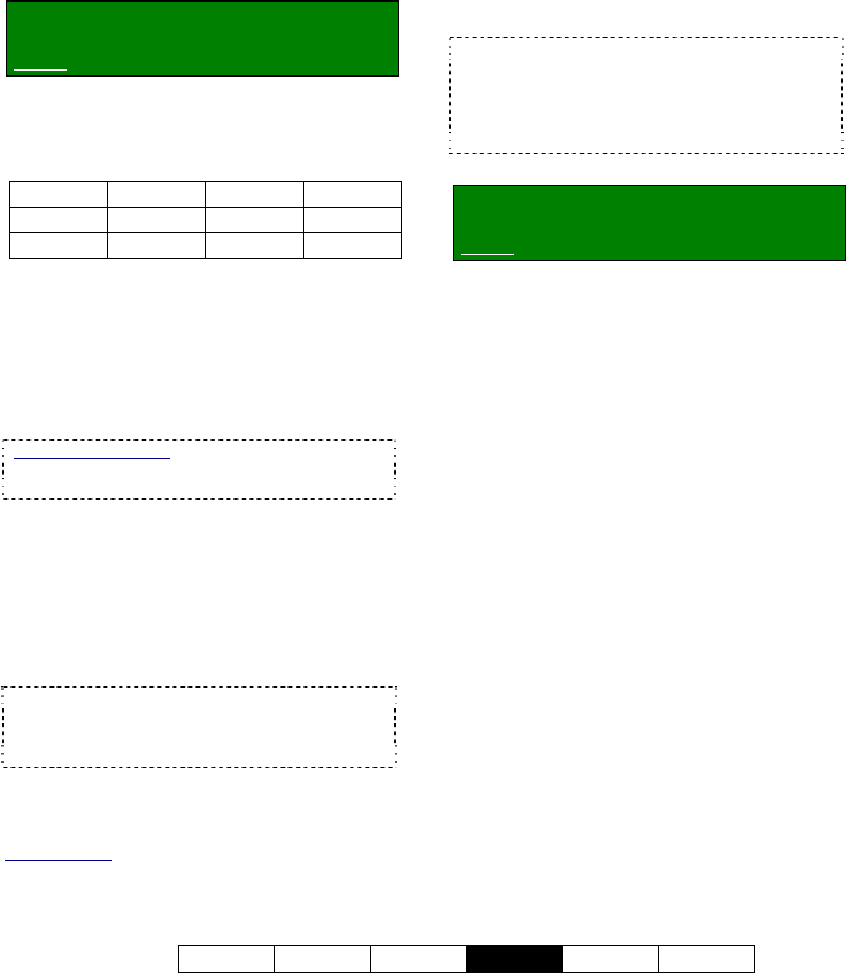
Resolution: Super, High, or Low
Format Super High Low
NTSC 640x480 320x240 160x120
PAL 640x480 384x288 192x144
Tip: "High" is the recommended setting, since it
provides good system performance and hard drive
usage, with reasonable image quality. "Super" can be
reduced to 640x240 to better handle especially fast
moving objects (see "Related Topics").
Recording Mode: This determines what the
system will do when the hard drive is getting
full--if no other drives have been selected
.
Drive(s) for Recording
:
13.1 Remote Stations: Basic Set-up
17.2.1 Drive Usage
With Linear recording mode, recording will be
disabled when the free space equals the
"Reserved Space" value (if no other drives
have been selected for recording). With
Circular recording, all files in the oldest date
folder(s) will be deleted for all cameras until the
free space equals the "File Retention Limit",
thus allowing recording to continue.
TechTip: To block alarm-triggered recordings from
being deleted, go to "DSR Configuration
ÖRecording Setup ÖFile", and ensure Allow
Alarm Files Overwrite is NOT enabled.
--------------------------------------------------
When finished, click [OK], and then
[Close] the utility menu.
Related Topics:
17.1 Video Setup (for fast motion and 'sync adjust')
17.2 Recording Setup (in DSR Configuration)
17.4
Frame Rate for Recording
You can set the recording "frame rate" for the
various types of recordings for each individual
camera. Slower frame rates provide smaller
recording files, and much-improved viewing
and downloading through a dial-up connection,
but provide fewer 'snapshots' per second.
TechTip: Eight frames/sec. or higher is
recommended for instant/manual recording and
alarm (sensor/motion) triggered recording. To save
drive space with scheduled recording, select four
frames/sec. or lower. The effective/actual frame-
rate may be reduced during multi-camera recording.
Locator: (Logged in at the Video Server as
a "Supervisor"),
Select: [Utility], then [Recorder Setting].
Select Frame Rate , and then make your
desired selections:
--------------------------------------------------
Instant: This is the frame rate for
instant/manual recording for each specific
camera.
Alarm: This is the frame rate for
motion/sensor triggered recording for each
specific camera.
Schedule: This is the frame rate for
scheduled recording for each specific camera.
--------------------------------------------------
When finished, click [OK], and then
[Close] the utility menu.