
User manual


AUTOSAT 2 CONTROL U S E R M A N U A L PAGE 13
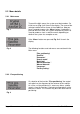
5.2.3 Satellite
The sub menu “Satellite“ (Fig. 4) allows the selection of the
satellite to be searched. The list of available satellites is
shown
The list of available satellites is shown (Fig. 5). Using the
“Plus“ or “Minus“ button you can select the required
satellite.
Confirm the selected satellite by pressing the “Enter“ button.
Subsequently the system will enter search mode and point
the antenna to the selected satellite. If a satellite has been
found, select a program on your receiver, which comes from
that satellite, to check that the correct satellite has been
found. If it is not the correct satellite, you may continue the
search by pressing the “Sat“ button. To be able to find the
required satellite a clear view to that satellite is a
prerequisite.
The following satellites are pre-programmed
(Name / Position / Skew):
“NSS6“ 95° East - 45 “Türksat“ 42,0° East - 26
„AsiaSat 4“ 122° East - 27 “ASTRA 2“ 28,5° East - 10
„Measat 2“ 148° East + 4 “ASTRA 3a“ 23,5° East - 13
“Optus B3“ 152° East - 36 “ASTRA 1“ 19,2° East - 2
“Optus C1“ 156 East - 31 ”Hotbird“ 13,0° East - 4
“Optus D1“ 160 East - 26 “Eutelsat W3“ 7,0° East + 1
“Intelsat 8“ 166 East + 25 “Sirius“ 5,0° East + 3
“Intelsat 701“ 180 East + 37 “Thor/ Intelsat“ 1,0° West + 8
“USERSAT1“ “AB3/Telecom 2C“ 5,0° West + 11
“USERSAT2“ “AB2/Telecom 2D“ 8,0° West + 14
“USERSAT3“ “Hispasat“ 30,0° West + 28
“USERSAT4“ “USERSAT“
5.2.4 Parameter
The sub menu “Parameter“ (Fig. 6) allows changing the
search parameters of satellites to be located.
With the “Plus“ or “Minus“ button mark the menu point
“Parameter“. Press the “Enter” button to reach the menu
(Fig. 7), which allows selection of that satellite, whose
parameters you want to change.
Fig. 5
Fig. 6
Fig. 4
AUS
GB