
Owner's manual
2
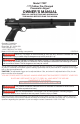
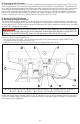
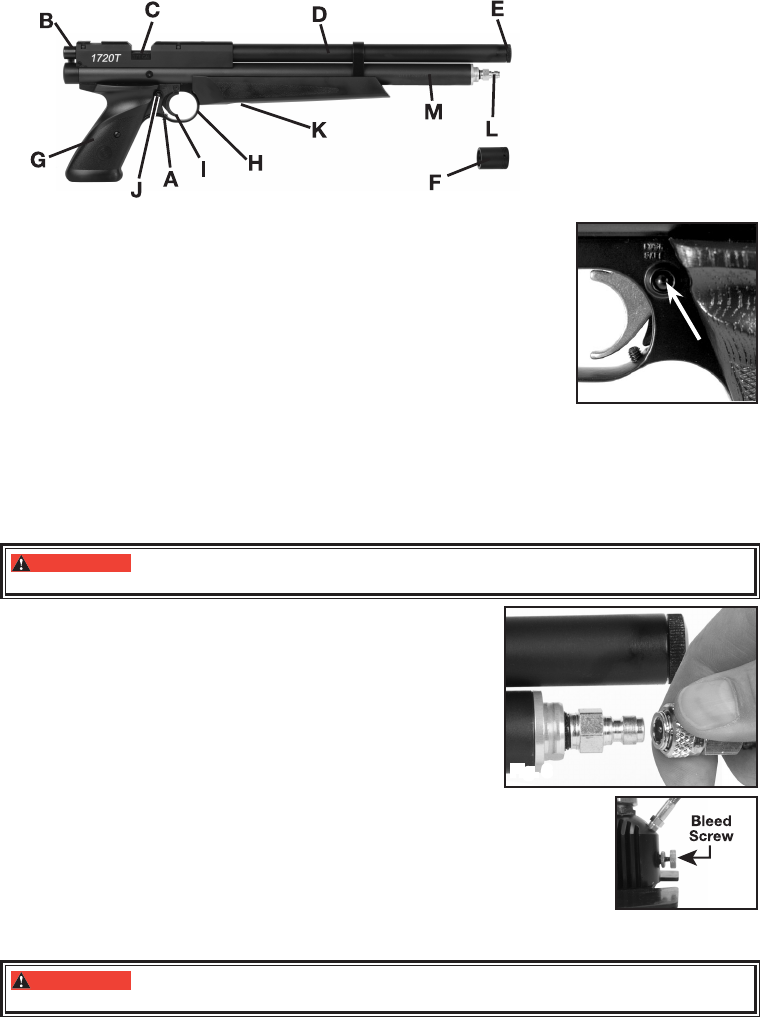
1. Learning the Parts of your New Airgun
Learning the names and parts of your new airgun helps you understand your owner’s manual.
A. Trigger Over travel screw
B. Bolt handle
C. Breech
D. Barrel
E. Muzzle
F. Protective cap
G. Grip
H. Trigger guard
I. Trigger
J. Safety
K. Pressure gauge
L. Fill nipple
M. Pressure Reservoir
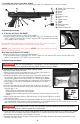
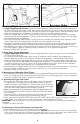
2. Operating the Safety
A. To Put the Air Pistol “ON SAFE:”
• Locate the safety directly in back of the trigger.
• Push the safety from the left side all the way in (Fig. 2). The safety is not “ON
SAFE” unless it is pushed all the way in and the RED ring around the left side
of the safety is NOT showing.
Like all mechanical devices, an air pistol safety can fail. Even when the safety is
“ON SAFE”, you should continue to handle the air pistol safely.
NEVER point the air pistol at any person. NEVER point the air pistol at anything
you do not intend to shoot
B.To Take the Air Pistol “OFF SAFE”:
• Push the safety from the right side all the way in.
• The air pistol is ready to re when “OFF SAFE”. When you can see the RED line on the left side of the
safety, the air pistol is “OFF SAFE” and can be red.
3. Pressurizing the Airgun
WARNING:
Use only compressed air in this airgun. Use no other gasses—including oxygen,
which can cause a re or explosion that may result in serious injury or death.
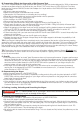
A. Pressurizing (Filling) the Airgun with a Hand Pump
• Be sure to wear eye protection.
• Make sure the airgun is unloaded and not cocked. (See section 4
for instructions on unloading and un-cocking.)
• Read all instructions with your hand pump so you are familiar with
its operation. Use only a pump designed for lling a pre-charged
airgun and outtted with a Foster #12FS or #12FSS quick discon-
nect tting. Do not use a standard air compressor or bicycle pump.
• Put the airgun “ON SAFE” (see section 2A) and point in a SAFE
DIRECTION.
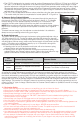
• Pull off the protective cap that covers the ll nipple on the airgun.
• Connect the quick-disconnect tting on the hand pump hose to the
ll nipple (g. 3.) by
º Pulling back and holding the knurled ring
º Connecting the tting over the ll nipple.
º Releasing the knurled ring and push it forward to lock the tting on to the ll
nipple.
• Make certain the bleed valve on the hand pump is fully closed (tighten in a clock-
wise direction) (g.4).
• Start pumping and continue until the gauge needles on your pump and on the air-
gun are between 2500 psi and 3000 psi depending on your desired tune. DO NOT ll the air gun to more
than 3000 psi (207 bar). See “Overll” information (section 3C).
WARNING:
Disconnecting the ll hose from the airgun without bleeding the air rst may result in
injury from hose whip as a result of pressure in the ll hose.
• Open the bleed screw on the pump base rapidly in a counter-clockwise direction to COMPLETELY bleed
the hose. You must bleed the ll hose COMPLETELY to avoid hose whip from pressure in the ll hose.
• Disconnect the pump from the ll nipple on the gun
• Replace the cap over the ll nipple. Always keep the ll nipple capped to eliminate the possibility of dirt
entering the check valve.
Fig. 2
PUSH
SAFE
Fig. 3
Fig. 4