
Frequently Asked Questions
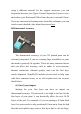
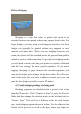

Table Of Contents

happen automatically. If you ever want to try a different infill
angle for these bridging layers, you can also do this by enabling
the “Use fixed bridging angle” option in your process settings.
(3) Adjust settings for optimal performance
The bridging regions in Simplify3D are printed with special
extrusion, speed, and cooling settings to achieve optimal
performance. The extrusion and speed adjustments for these
regions can be found on the Other tab of your process settings.
Typically, you will want to set the “Bridging extrusion multiplier”
to 100% or more, as lower values may have trouble properly
sealing the bottom of these surfaces. The “Bridging speed
multiplier” may require some experimentation, as some printers
will perform better with slow bridging, while others get better
results by moving quickly. Finally, you can find the bridging fan
speed settings on the Cooling tab of your process settings.
Typically, you will want to set the “Bridging fan speed override”
to a large value to make sure the bridges are cooled as quickly as
possible. Experiment with these settings to find the best
combination for your specific 3D printer and filament. There are
many bridging test models available that can help with this
calibration.
(4) Use supports for longer bridges
In the event that you are unable to get the results you want
after tuning the settings mentioned above, you may find that
adding support structures will allow you to achieve the best quality.
The support structures will provide an extra foundation for the
bridging regions, greatly improving their odds of success. You can