
Frequently Asked Questions
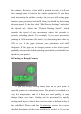
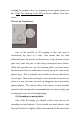

Table Of Contents

19:Gaps in Thin Walls
Because your 3D printer includes a fixed size nozzle, you
may encounter issues when printing very thin walls that are only a
few times larger than the nozzle diameter. For example, if you
were trying to print a 1.0mm thick wall with a 0.4mm extrusion
width, you may need to make some adjustments to ensure your
printer creates a completely solid wall and does not leave a gap in
the middle. Simplify3D already includes several dedicated settings
to help with thin wall printing, so we will describe the relevant
settings below.
(1) Adjust the thin wall behavior
The first settings that you need to verify are the dedicated thin
wall settings that Simplify3D includes. To view these settings,
click “Edit Process Settings” and select the Advanced tab. The
software includes several different options for the Internal Thin
Wall Type. The default option typically uses something called
“gap fill” to fill the small gaps between your thin walls. This will
create a back-and-forth infill pattern that adjusts to fill the space
between these thin gaps. However, the software also includes
another useful option that can fill these thin walls with a single