
Manual


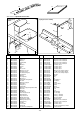


Table Of Contents
- THE ROUTER TABLE
- ASSEMBLY INSTRUCTIONS
- Assembly of legs
- Mounting Table to Workbench or Workboard
- Mounting Table to a Workmate
- Identification of Mounting Holes and Screws
- Re-Drilling of Router Base
- Re-Drilling of Insert Plate
- Re-Drilling of Insert Plate and Router base
- Fitting Insert Plate to Table Surface
- Fitting Router to Insert Plate
- Selecting & Fitting Insert Plate Rings
- Fitting Lead-on Pin
- Assembly & Mounting of Tenon Push Block
- Assembly of Safety Dust Guard to Back Fence
- Assembly of Back Fence
- Attachment of Back Fence to Table
- Assembly & Alignment of Mitre Fence
- Fitting of No-Volt Release Switch
- OPTIONAL ACCESSORIES
- OPERATION
- APPENDIX

-33-
Router Table for the Craftsman
75mm
Switch Side
65°
FRONT
C
C
2 off 6mm dia.
through holes
required to be
drilled into base
of router.
Position
of plate
Threaded hole
for lead-on piece
Plunge
lock
handle
side
Plan showing positions of holes required
to be drilled in base of Elu MOF96(E) Mk1
and other similar makes
Underside view of Elu
MOF 96(E) Mk1 base