
Manual


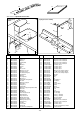

Table Of Contents
- THE ROUTER TABLE
- ASSEMBLY INSTRUCTIONS
- Assembly of legs
- Mounting Table to Workbench or Workboard
- Mounting Table to a Workmate
- Identification of Mounting Holes and Screws
- Re-Drilling of Router Base
- Re-Drilling of Insert Plate
- Re-Drilling of Insert Plate and Router base
- Fitting Insert Plate to Table Surface
- Fitting Router to Insert Plate
- Selecting & Fitting Insert Plate Rings
- Fitting Lead-on Pin
- Assembly & Mounting of Tenon Push Block
- Assembly of Safety Dust Guard to Back Fence
- Assembly of Back Fence
- Attachment of Back Fence to Table
- Assembly & Alignment of Mitre Fence
- Fitting of No-Volt Release Switch
- OPTIONAL ACCESSORIES
- OPERATION
- APPENDIX

Router Table for the Craftsman
-25-
Moulding the Shield
A suitable bearing guided cutter should be chosen to
mould the shield.
1.
Remove plug from mains.
2.
Fit chosen moulding cutter.
3.
Adjust height of cutter to achieve shape required.
If the full edge of the workpiece is to be machined
leave the template attached to the workpiece so as
to provide a guide for the bearing. Otherwise the
template can be removed, providing there is
sufficient edge for the bearing to follow. See fig Y.2.
4.
Repeat the same routing procedure as before. If the
profile required involves excessive removal of
material, it is advisable to take two passes with the
cutter. First reduce the height of the cutter protrud-
ing from the table, this in effect, reduces the
amount of material which will be removed, or fit a
larger bearing, if one is available for that particular
cutter.
The second pass can then be made to give the
required finish.
Carrying out this two stage routing operation has many
advantages.
a.
Improved finish on workpiece
b.
Less load on cutter and router
c.
Far less risk of workpiece snatching
Definition of Snatching
This can be described as the cutter catching the
workpiece and projecting it away from the direction of
rotation. The workpiece is often taken from the operator's
hands and projected across the work area. It can have
potentially dangerous consequences if the cutter is
unguarded and/or the operator's hands are too close to
the cutter. Damage to the cutter can also be caused.
The following precautions should be made to avoid a
potentially dangerous situation:
1.
Fit the Profiling Top Guard, this will prevent
fingers contacting the cutter.
2.
Always rout in the direction which opposes the
direction of rotation of the cutter. Routing with the
direction of the cutter is called back-cutting and will
cause snatching.
3.
Use the Lead-On Pin to provide support for the
workpiece during the initial start of the routing
operation, it will also ensure that you approach the
cutter from the correct side.
4.
When a deep cut is required or the material is
particularly dense, then take two or three passes.
5.
Ensure the cutter always has a sharp cutting edge.
6.
Do not reduce pressure of the workpiece or let go
of it. Always keep both hands on the workpiece and
keep an even pressure against the guide bearing.
7.
Do not use too great a feed speed. If the revolu-
tions of the router drop, it is a good indication that
either too deep a pass is being made and/or the
cutter is blunt. Therefore reduce the depth of cut
and/or resharpen your cutter.
If the above points are followed, profile routing using
bearing guided cutters is both safe and rewarding. It is
however advisable for those new to routing to avoid using
larger diameter cutters until proficient with the technique
described. Under no circumstances should this type of
operation be carried out with cutters not having a guide
ball bearing or pin.
fig. Y.3
Workpiece
position 3
Workpiece
position 2
Top Guard
Cutter Rotation
Workpiece
position 1
Lead-On Pin