
User Guide Instruction Manual


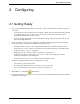
Table Of Contents
- 1 About Bria iPad Edition
- 2 Configuring
- 3 Making Phone Calls
- 3.1 Starting and Quitting Bria
- 3.2 Using the Bria Interface
- 3.3 Placing a Call
- 3.4 Handling Incoming Calls
- 3.5 Handling One Established Call
- 3.6 Recording Calls
- 3.7 Placing a Second Bria Call
- 3.8 Handling Two Established Calls
- 3.9 Unattended (Blind) Transfer
- 3.10 Attended Transfer
- 3.11 Conference Call
- 3.12 Handling Video Calls
- 3.13 Call History
- 3.14 Accessing Voicemail
- 4 Presence and Instant Messaging
- 5 Settings
- A Troubleshooting
- B Dial Plans
- C Glossary
CounterPath Corporation
4
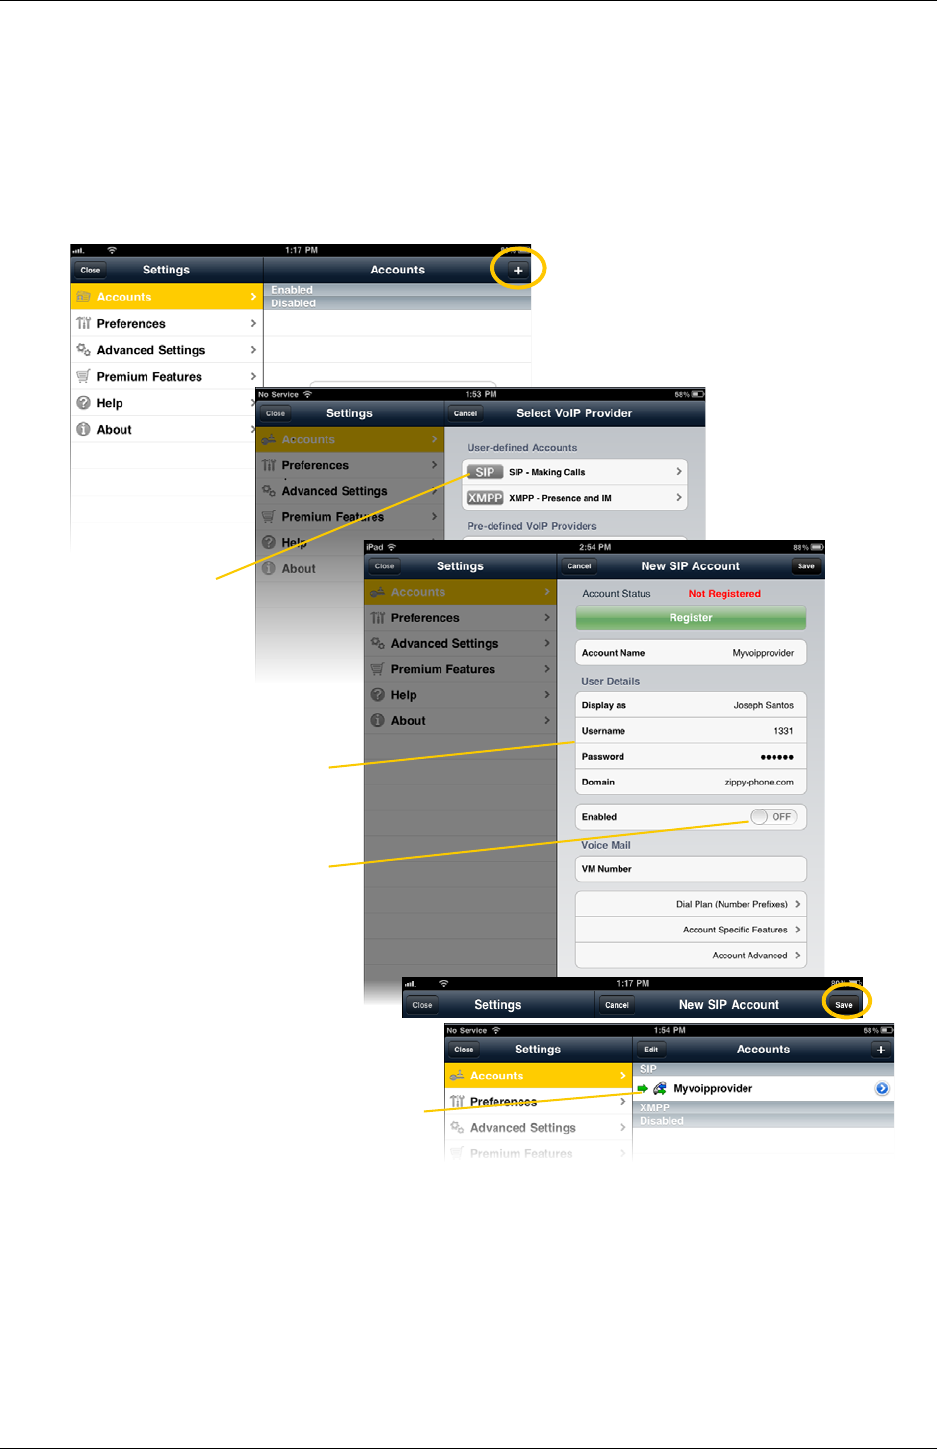
2.2 Setting up Bria
To use Bria as a phone, you need to create a SIP account with the information provided by your VoIP service
provider.
When you have successfully registered, tap the dialpad icon and try placing a call.
Tap +
Complete the User Details section and Voice
Mail section (optional) with the information
provided by your service provider
Tap Enable. The
account is registered.
Select your VoIP service
provider, if it is on the list.
Otherwise, select Generic
SIP Account.
Then tap Save
The account list appears
with the new account