
Use and Care Manual

11
BEFORE FIRST USE
Setting Up Test Run
1. Remove all packaging around and
inside the grill, including any temporary
stickers.
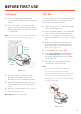
2. Place on a stable, level, heat-resistant
surface, away from anything that can be
damaged by steam or heat (such as walls
or cupboards).
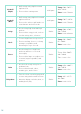
1. Make sure there is no food or packaging
in the grill and plug it in.
2. Place the splash guard on the underside
of the lid, below the heating element.
3. Place the cooking pot in the base, then
place the grill grate on top of the cooking
pot.
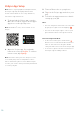
4. Remove the filter cover and slide the
filter into the back of the grill with the
pull tabs facing outward. Replace the
filter cover.
[Figure 1.2]
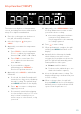
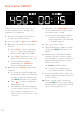
5. Press POWER, then press MAX.
6. Press START/PAUSE to begin heating.
The START/PAUSE button will light
up, and the display will show the timer
counting down.
7. The grill will stop heating and beep
several times when finished.
A test run will help you become familiar with
your grill, make sure it’s working correctly,
and clean it of possible residues.
Note:
•
You may notice a slight smell during this
process. This is normal for a new grill.
•
The outside of the grill will be hot during and
after use. To open, use handle and a heat-
resistant glove or oven mitt to avoid touching
the surface of the grill.
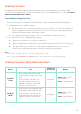
Note:
Leave 7 inches / 18 cm of space behind and
8 in / 20 cm of space above the grill.
[Figure 1.1]
Note:
Do not wash the smoke filter.
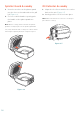
3. Wash the basket, cooking pot, and
grill grate thoroughly, using either a
dishwasher or a non-abrasive sponge.
4. Wipe the inside and outside of the grill
with a slightly moist cloth. Dry with a
towel.
5. Wipe the outside surface of the smoke
filter. Dry with a towel.
7 in /
18 cm
8 in /
20 cm
Figure 1.1
Figure 1.2