
Use and Care Manual


58
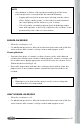
Oven Cavity Soil Level Self Clean Cycle Setting Select Button
Lightly Soiled 3-Hour 3
Moderately Soiled 4-Hour 4
Heavily Soiled 5-Hour (Default) 5
Setting Self Clean
1. Start with oven at room temperature. Remove oven racks and accessories
from the oven.
2. Wipe any heavy spillovers or excess debris. Close the oven door.
3. Press CLEAN once. "SELF CLEAN" and the default 5-hour cycle setting are
shown in the display.
4. (Optional) Press 3, 4, or 5 to select a different cycle setting if desired.
5. (Optional) To set delayed Self Clean, press DELAY and set the start time
of day. (Use the DELAY button to switch between AM and PM if needed.)
6. Press START/ENTER to start the Self Clean cycle. The oven door will lock
and the display will show the Lock icon after several minutes.
7. After the Self Clean cycle, the lock releases automatically once the oven is
cooled. Wipe out any ashy residue with a damp, non-abrasive sponge or
cloth. Once the oven cavity is cleaned, replace racks and any other
accessories.
NOTE:
• Press CLEAR/OFF to cancel Self Clean at any time. The oven door will
remained locked until the oven temperature has cooled sufficiently.
• Do not force the oven door open when the Lock icon is displayed.
Forcing the door open will damage the door.
• After a Self Clean cycle, fine lines may appear in the porcelain because
it went through heating and cooling. This is normal and will not affect
performance.
• Avoid leaning or resting on the oven door glass while cleaning the
oven cavity.
• Do not use oven cleaners. Commercial oven cleaner or oven liner
protective coating of any kind should not be used in or around any
part of the oven.
• Do not use any steel scouring pads, abrasive pads or cleaners as these
materials can permanently damage the oven surface.