
Programming instructions

ROBOTC
VEXnet Upgrade Installation • 4
©
Carnegie Mellon Robotics Academy / For use with VEX
®
Robotics Systems
Setup
VEXnet Upgrade Installation Instructions (cont.)
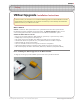
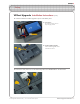
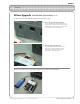
6. (Optional) Connect the 9V backup battery to the VEXnet Upgrade.
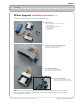
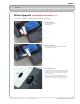
5a. ApplytheVelcro
Attach the Velcro loop piece (fuzzy) to the USB adapter
and the hook piece (bristly) to the Microcontroller so they
will align once the USB adapter is inserted into the VEXnet
Upgrade. This will ensure that the adapter will not get
disconnected while the robot is running.
Note: It does not matter which VEXnet USB adapter you use.
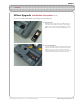
6. Connectthe9VBackupBattery
The backup battery maintains VEXnet communication in
the event of a main power loss and is mandatory during
ofcial VEX competitions, but optional in classroom use.
Connect the backup battery to the front of the VEXnet
Upgrade. (The battery is not included with kit.)
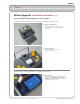
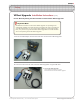
5. Connect a VEXnet USB adapter to the VEXnet Microcontroller Upgrade.
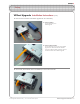
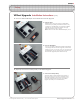
5b. InserttheUSBAdapter
If you are connecting a VEXnet Microcontroller Upgrade that
was packaged with the Transmitter Upgrade, insert the USB
adapter now. If not, or if you are unsure, you can wait to insert
the USB adapter until you manually pair the Transmitter and
Microcontroller Upgrades (Part III of this document).