
Programming instructions

ROBOTC
VEXnet Upgrade Installation • 2
©
Carnegie Mellon Robotics Academy / For use with VEX
®
Robotics Systems
Setup
VEXnet Upgrade Installation Instructions (cont.)
2. Attach the VEXnet Upgrade to the top of the Microcontroller.
Note: When securing the VEXnet Upgrade and Microcontroller assembly to your robot, the bottom
four screws can be removed, inserted through a section of the robot chassis, and then reconnected
to the bottom of the assembly.
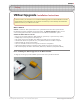
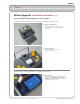
2a. CollecttheParts
Gather the following parts before moving on:
1 Microcontroller
1 VEXnet Microcontroller Upgrade
8 3/4” 8-32 Screws
4 1/2” Standoffs
1 7.2V Battery
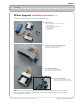
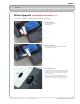
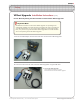
2b. SecureComponentstotheVEXnetUpgrade
Use four of the screws to attach the 1/2”
standoffs to the VEXnet upgrade.
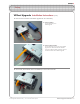
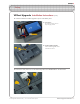
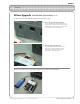
2c. PlacetheVEXnetUpgrade
Align the back of the VEXnet Upgrade
with the back of the Microcontroller.
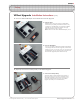
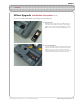
2d. SecuretheVEXnetUpgrade
Use the four remaining screws to attach
the VEXnet Upgrade to the Microcontroller.