
Programming instructions
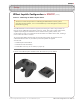


ROBOTC
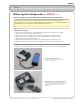
VEX Cortex Conguration over USB • 10
©
2011 Carnegie Mellon Robotics Academy / For use with VEX Robotics Systems
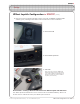
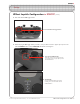
4. Move both joysticks through their full ranges of motion. When the remote control detects
that the joysticks have been fully rotated, the JOYSTICK LED stops blinking red and green,
and switches to a solid green.
There is a 10 second time limit to complete steps 4 and 5. If they are not completed in
time, the calibration process will timeout and the VEXnet LED will blink red briey.
Important - Time Sensitive Instructions
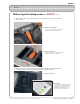
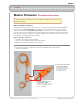
4a. Move the Joysticks
Move the joysticks through their full ranges of
motion - Up, Down, Left, Right, and in a circle.
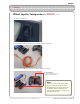
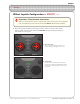
4b. JOYSTICK LED
Once the remote control detects that the joysticks
have been fully rotated, the JOYSTICK LED switches
to solid green, indicating that you can stop moving
the joysticks.
VEXnet Joystick Conguration in ROBOTC (cont.)
Setup