
Programming instructions


ROBOTC
VEX Cortex Conguration over USB • 8
©
2011 Carnegie Mellon Robotics Academy / For use with VEX Robotics Systems
VEXnet Joystick Conguration in ROBOTC (cont.)
Section 3: Calibrating the VEXnet Joystick Values
The VEXnet Remote Control includes two joysticks (each having an X and Y-axis), 8 buttons on
the front, and 4 additional trigger buttons on the top. Inside, there is also 3-Axis accelerometer,
capable of providing X-Y-Z acceleration values. Values from the joysticks, buttons, and
accelerometer are sent as a constant stream of information over VEXnet to the robot, enabling a
user to control the robot in real-time.
To ensure that the VEXnet Joystick sends out accurate joystick values, the joysticks must be
calibrated before their rst use, and after any rmware updates are applied.
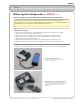
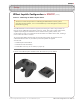
You will need:
• A VEXnet Joystick with batteries
• A VEX Cortex with robot battery
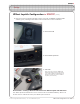
• A small Allen wrench (1/16” or smaller) or paper clip
This section contains the procedure for calibrating the VEXnet Remote Control joysticks.
Some steps are time-sensitive, so it’s recommended that you read through the instructions once
before following along.
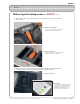
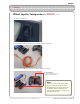
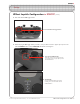
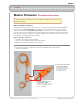
1. Power on the VEXnet Joystick and VEX Cortex. Allow them to sync over VEXnet.
Setup