
User's Manual

EnCOVER VE™ Access Pod (VAP) Installation and Commissioning
Dual Band EnCOVER VE™ Instant Coverage Solution User Manual 36
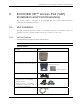
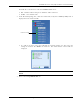
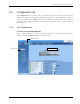
5.1.2.2 Wall Mount
Assemble the VAP to the wall-mount (the adaptor and wall mount screws, sticky tape and cable
are included in the VAP kit as described in Table 10: VAP Kit)
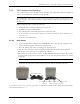
• Connect the RJ-45 jumper cable (CAT-5e/6) to the VAP
• Attach the VAP to the wall according to the planed location using supplied screws (for “anti-
theft” installation) or the double sided sticky tape for the wall-mount adaptor (for “plug-and-
play” installation)
• Plug the other side of the cable into the adjacent standard (RJ-45) Ethernet connection jack.
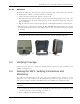
• When using an external antenna, connect the Ext. Antenna SMA connector(s) to the external
antenna(s). This option must be SW configured via the web GUI (internal antenna is enabled
by default).
Note: The maximum external antenna gain should not exceed 10 dBi.
• Verify that the VAP receives power and sync up to the VCU via the LEDs on the unit.
+ =
5.2 Verifying Coverage
Verify coverage in the areas, adding and moving VAPs for optimal coverage according to the
principles described in
3.3.
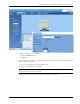
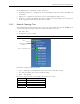
5.3 Naming the VAPs, Verifying Connections and
Monitoring
The VAPs are auto-discovered by the VCU and can be monitored via a remote or a local
connection to the system Master VCU. No configuration procedure is required; however, if you
wish, you may assign each VAP an identifiable name corresponding to its physical location.
Note: See section
6 for full explanation about navigating the EnCOVER VE™ Web GUI
application.
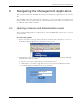
1. If a session is not already opened to the EnCOVER VE™ Web management application, open
a session to the Master VCU according to section
4.4.1.
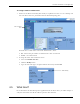
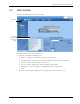
2. Select a VAP from the Network Topology Tree.
Access Pod
Wallmount Adaptor Assembly