
User's Manual


Administration
P/N 709C011801
Page 108
To create a new group
1. Login as System Administrator.
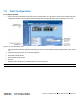
2. Click on the Security option of the Management tab. The Group Management dialog appears, displaying all defined
groups.
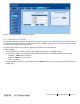
Figure 8-3. Group Management Dialog
NOTE: To remove a group, click Remove. The group along with its accounts is removed after a verification prompt.
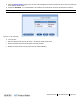
3. Click Add. The Add Group dialog appears.
Figure 8-4. Add a New Group
4. Enter new group name (enter only alphanumeric characters - no spaces) and click OK. Two operations occur:
• The new group name will be listed.
• The Group Administrator is automatically created with default authentication as previously described).
5. Notify each Group Administrator of his/her login name, password and group name along with a strong recommendation
(requirement) to change the Group Administrator default assigned password (on page 112).
NOTE: Only the Group Admin has access to his/her own password definitions.