INSTALLATION & SERVICE MANUAL QUANTUM SERIES IMI CORNELIUS INC.
TABLE OF CONTENTS UNIT SPECIFICATIONS.................................................................... 1 PREINSTALLATION...........................................................................2 Receiving .............................................................................................................. 2 Unpacking............................................................................................................. 2 Counter Location ...................................................
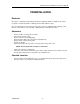
Quantum Series Installation and Service Manual UNIT SPECIFICATIONS Clearance Recommended: 12” (30.48 cm) on top and 4” (10.16 cm) required in back for air circulation if sides are blocked off. If sides are open only 2” (5.08) are required in back. Space between bottom of unit and counter cannot be obstructed in foot print area. Electrical Connection: 6ft. long (1.83m) power cord with 3-prong plug attached to dispenser. Export models have line cord less plug.
Quantum Series Installation and Service Manual PREINSTALLATION RECEIVING Each unit is completely tested and inspected before shipment. At time of shipment, the carrier accepts the unit and any claim for damage must be made with the carrier. Upon receiving from the carrier, please, inspect the carton for visible damage. If damage exists, have the carrier make a note on the bill of lading and file a claim with the carrier. UNPACKING • • • • • • • Remove staples securing carton to pallet.
Quantum Series Installation and Service Manual INSTALLATION SPECIFICATIONS WATER SUPPLY The Quantum Juice Dispensing machine is designed to dispense juice at a high flow rate. It is very important that the incoming water line is dedicated for the unit, or at least does not have other machines connected which could cause a water surge; i.e., a dishwashing machine. NOTE: For increased cooling capacity the unit should be connected to a remote recirculating cooling unit.
Quantum Series Installation and Service Manual FLUSHING AND SANITIZING ON START UP Follow standard sanitizing and flushing procedure. PROGRAMMING PORTION CONTROL (OPTIONAL) The portion control supplied with your orange juice dispenser has been programmed to pour 7, 12, and 16 ounce drinks. The “XL” size has also been programmed to pour 16 ounces. Should pour size adjustments be required, please follow the instructions below: 1.
Quantum Series Installation and Service Manual CONCENTRATE LOADING AND BRIXING PLACING CONCENTRATE PRODUCTS ON DISPENSING PLATFORM To engage the concentrate container, place it in the desired position and press down into bottle adapter opening on dispensing platform tray (inside the cabinet). NOTE: Make sure o-ring seal on the container adapter is lubricated; otherwise, you may experience difficulties with container replacement.
Quantum Series Installation and Service Manual CLEANING AND SANITIZING PROCEDURES DAILY: SYSTEM FLUSH PROCEDURE 1. A 1 quart (0.95 liters) (32 fluid oz. minimum) empty container is needed. Place the empty container on the drip tray grill under the nozzle of the dispensing station to be flushed. 2. Open the cabinet door. 3. Choose the valve handle that corresponds with dispensing station to be flushed. 4. Move chosen handle from “dispense” position to the “flush” position. 5. Close the door. 6.
Quantum Series Installation and Service Manual 9. Fill a clean empty concentrate container with 2 quarts (1.9 liters) of sanitizing solution, place on dispensing platform, and insert bottle fitting into bottle adapter. NOTE: Do not reuse the same sanitizing solution used to clean nozzles, static mixers, etc. 10. Place handle in dispense position and close door. 11. Run dispensing station for 90 seconds then stop; allow sanitizing solution to remain in lines for 5 minutes. 12.
Quantum Series Installation and Service Manual 6. Remove the nozzle and static mixers. 7. Carefully lift and pull the platform from the dispenser and place it in a clean and well lit area for service. Replacement of Pump Hose (see figure 2): 1. Remove platform as described above in removal of platform instructions. 2. Remove the two white plastic hose clamps from the pump tube connections. Remove the two stainless steel concentrate delivery tubes from the hose ends. 3.
Quantum Series Installation and Service Manual -9- 7208011206
Quantum Series Installation and Service Manual 7208011206 - 10 -
Quantum Series Installation and Service Manual TROUBLE-SHOOTING GUIDE The following pages contain trouble-shooting charts designed to aid an experienced serviceman in diagnosing any operating problems that may be experienced. In order to gain maximum benefit from the charts, please note: 1. Start at the beginning of the chart and supply the appropriate answer to each question. 2. Do not skip any section, unless instructed to do so. You may miss the solution to your problem. 3.
Quantum Series Installation and Service Manual No cooling (con’t) No water dispensed, concentrate only. 7208011206 Defective start relay located on upper rear shelf inside dispenser There should be line voltage on the black wire of the relay when there is line voltage present on the orange OR yellow wire. Replace relay if it fails this test. Compressor starts but hums and trips overload Seized or shorted compressor, replace.
Quantum Series Installation and Service Manual No water dispensed, concentrate only (con’t). Freeze-up of water coil or concentrate chamber Unplug dispenser and allow 2-4 hours to thaw. Water or concentrate thermostat set too low, recalibrate to 34oF -40 oF (1.1 o C - 4.5 oC). Defective water or concentrate thermostat, replace. Refrigerant solenoid stuck open or not closing fully.
Quantum Series Installation and Service Manual No concentrate dispensed, water only Excessive remnant left in empty concentrate pouch Concentrate refill light comes on prematurely Concentrate refill light does not come on at all 7208011206 Dispense tube not fully engaged into receptacle on concentrate pouch Refer to Concentrate Loading section of this manual Dispense tube disconnected from mixing chamber Refer to Concentrate Loading section of this manual Slide block on pump in open position Clos
Quantum Series Installation and Service Manual Concentrate refill light does not come on at all (con’t) Improperly loaded tube Refer to concentrate loading section of this manual Bad VRB board Replace VRB board Bad portion control Replace portion control Incoming water supply too warm Optimum performance is achieved when the dispenser utilizes water from a pre-cooler Ambient air too warm Relocate dispenser Excessive demand on dispenser Add water pre-cooler or second dispenser Dirty condenser c
Quantum Series Installation and Service Manual Concentrate warm, water cold (con’t) Loss of refrigerant charge due to leak in system Repair leak and recharge system Brix Problem Water supply pressure too low, less than 20 psi (1.4 bar) flowing or water pressure fluctuates sharply Correct water supply problem to ensure a constant 40 psi (3 bar) flowing to the dispenser Water flow control binding or spring is defective Clean and/or replace parts as necessary Improperly thawed concentrate.
Quantum Series Installation and Service Manual Machine continues to dispense after dispense button is released or dispenses without operator input Sold Out light illuminates when concentrate no longer passes through the pump. Portion control pad stuck in on position Disconnect the wire harness from the rear of the portion control and close the door. If unit does not dispense on its own the portion control is bad (stuck on) Relay on voltage regulator board (VRB) stuck on.
Quantum Series Installation and Service Manual Sold Out light illuminates when concentrate no longer passes through the pump.(con’t) Improper loading procedures will usually result in low brix conditions and thus erratic sold out indications. Check that the pouch of juice is properly loaded in the pouch holder. Tube fitting should be located at the bottom of the pouch holder and the tube should be approximately centered in the bottom portion of the opening of the holder.
IMI Cornelius Inc. One Cornelius Place Anoka, MN 55303-1592 U.S.A.