
User guide

74 Corel VideoStudio Pro User Guide
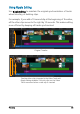
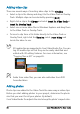
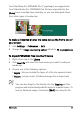
Timeline after a clip is inserted in the Video Track with
Ripple Editing enabled on some tracks. Clips on the
tracks with Ripple Editing enabled move when a new
clip is inserted to maintain original synchronization.
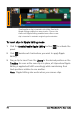
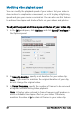
To insert clips in Ripple Editing mode
1 Click the Enable/Disable Ripple Editing button to activate the
panel.
2 Click beside each track where you want to apply Ripple
Editing.
3 Drag a clip to insert from the Library to the desired position on the
Timeline. As soon as the new clip is in place, all clips where Ripple
Editing is applied will shift accordingly while maintaining their
track positions relative to one another.
Note: Ripple Editing also works when you remove clips.